📌 1.Redux

🌟 1.1. Redux理解


📚 1.1.1. 学习文档

  1. 英文文档: Redux Official
  2. 中文文档: Redux 中文版
  3. GitHub: Redux GitHub

🧠 1.1.2. Redux是什么?

  1. Redux是一个专门用于做状态管理的JavaScript库,不是React的插件。
  2. 它可以与React、Angular、Vue等框架一同使用,但主要与React一起使用。
  3. 主要作用: 集中式管理React应用中多个组件共享的状态。

🤔 1.1.3. 何时需要使用Redux

  1. 当某个组件的状态需要被其他组件访问或共享时。
  2. 当一个组件需要更改另一个组件的状态时。
  3. 原则: 能不使用就尽量不使用。当不使用会带来困难时,再考虑使用。

🔄 1.1.4. Redux工作流程


🌟 1.2. Redux的三大核心概念


📜 1.2.1. Action

  1. 表示操作的对象。
  2. 通常包含以下属性:
    • type: 唯一标识,是一个字符串。
    • data: 任意类型的数据属性。

例: { type: 'ADD_STUDENT', data: {name: 'tom', age: 18} }


🔧 1.2.2. Reducer

  1. 用于初始化和处理状态的函数。
  2. 是一个纯函数,根据当前的state和传入的action返回新的state。

🏪 1.2.3. Store

  1. 把state、action、和reducer联系起来的对象。
  2. 可以通过以下方式得到它:
    1
    2
    3
    import { createStore } from 'redux';
    import reducer from './reducers';
    const store = createStore(reducer);
  3. 它的功能:
    • getState(): 获取状态。
    • dispatch(action): 分发action,触发reducer,产生新的state。
    • subscribe(listener): 注册监听,当产生新的state时自动调用。

🌟 1.3. Redux的核心API


🏗️ 1.3.1. createStore()

用于创建包含指定reducer的store对象。


📦 1.3.2. Store对象

  1. Redux库的核心对象。
  2. 维护着state和reducer。
  3. 主要方法:
    • getState()
    • dispatch(action)
    • subscribe(listener)

🛠️ 1.3.3. applyMiddleware()

用于应用基于Redux的中间件。


🤝 1.3.4. combineReducers()

用于合并多个reducer函数。


🌟 1.4. Redux异步编程

1.理解

  • redux默认是不能进行异步处理的,
  • 某些时候应用中需要在redux中执行异步任务(ajax, 定时器)

2.使用异步中间件

1
npm install --save redux-thunk

📌 2.求和案例_redux精简版

🚀 2.1. 初步设定

  • 🧹 移除Count组件的内部状态。

Count组件

1
2
3
4
5
6
7
8
9
10
11
12
13
14
15
16
17
18
19
20
21
22
23
24
25
26
27
28
29
30
31
32
33
34
35
36
37
38
39
40
41
42
43
44
45
46
47
48
49
50
51
52
53
54
55
56
57
58
59
import React, { Component } from 'react';
import store from '../../redux/store';

export default class Count extends Component {

// 在组件挂载时,监听store的状态变化(也可以写在index文件中如下)
componentDidMount(){
store.subscribe(()=>{
this.setState({}); // 当store状态改变时, 使用setState触发组件重新渲染
});
}

// 处理加法操作
increment=()=>{
const {value} = this.selectNumber; // 获取选择的数值
store.dispatch({type:'increment',data:value*1}); // 发起一个increment的action
}

// 处理减法操作
decrement=()=>{
const {value} = this.selectNumber;
store.dispatch({type:'decrement',data:value*1});
}

// 如果当前计数为奇数,则处理加法操作
increamjishu=()=>{
const {value} = this.selectNumber;
const count = store.getState();
if (count % 2 !== 0) {
store.dispatch({type:'decrement',data:value*1});
}
}

// 延迟2秒后处理加法操作
increamodd=()=>{
setTimeout(()=>{
const {value} = this.selectNumber;
store.dispatch({type:'increment',data:value*1});
}, 2000);
}

render() {
return (
<div>
<h2>当前求和为:{store.getState()}</h2>
<br />
<select ref={c=>this.selectNumber=c}>
<option value="1">1</option>
<option value="2">2</option>
<option value="3">3</option>
</select>
<button onClick={this.increment}>+</button>
<button onClick={this.decrement}>-</button>
<button onClick={this.increamjishu}>和为奇数再加</button>
<button onClick={this.increamodd}>等一等再加</button>
</div>
);
}
}

index.js监听store的状态变化

1
2
3
4
5
6
7
8
9
10
11
12
13
14
15
16
17
18
19
20
21
22
23
24
25
26
27
//引入react核心库
import React from 'react'
//引入ReactDOM
import ReactDOM from 'react-dom/client';
import { BrowserRouter} from 'react-router-dom/cjs/react-router-dom'
//引入App
import App from './App'
import store from './redux/store';
const root = ReactDOM.createRoot(document.getElementById('root'));

root.render(
<React.StrictMode>
<BrowserRouter>
<App />
</BrowserRouter>
</React.StrictMode>
);

store.subscribe(()=>{
root.render(
<React.StrictMode>
<BrowserRouter>
<App />
</BrowserRouter>
</React.StrictMode>
);
})

🏗 2.2. 结构搭建

src目录下创建:

1
2
3
- redux
- store.js
- count_reducer.js

📘 2.3. store.js配置:

  1. 📦 引入redux中的createStore函数,创建一个store。
  2. 📡 createStore在调用时需要传入一个为其服务的reducer。
  3. 🌍 记得暴露store对象。

案例: createStore已弃用采用这种方法引用

1
2
3
4
5
6
7
8
9
/* 
该文件专门用于暴露一个store对象,整个应用只有一个store对象
*/
//引入createStore,专门用于创建redux中最为核心的store对象
import { legacy_createStore as createStore} from 'redux'
//引入为Count组件服务的reducer
import countReducer from './count_reducer'
//暴露store
export default createStore(countReducer)

📖 2.4. count_reducer.js配置:

  1. 🌐 reducer本质上是一个函数,接收:preState, action,返回处理后的状态。
  2. 🔧 reducer有两大任务:初始化状态、加工状态。
  3. 🚀 当reducer被首次调用时,是由store自动触发的。传递的preStateundefined, 传递的action是: {type:'@@REDUX/INIT_a.2.b.4}

案例:

1
2
3
4
5
6
7
8
9
10
11
12
13
14
15
16
17
18
19
/* 
1.该文件是用于创建一个为Count组件服务的reducer,reducer的本质就是一个函数
2.reducer函数会接到两个参数,分别为:之前的状态(preState),动作对象(action)
*/
const initState = 0 //初始化状态
export default function countReducer(preState=initState,action){
console.log(preState);
//从action对象中获取:type、data
const {type,data} = action
//根据type决定如何加工数据
switch (type) {
case 'increment': //如果是加
return preState + data
case 'decrement': //若果是减
return preState - data
default:
return preState
}
}

📣 2.5. 实时监测 📡

  • index.js中监测store的状态变化,一旦发生改变,重新渲染<App/>

📝 备注:redux只负责管理状态。至于状态的改变驱动着页面的展示,这需要我们手动实现。

📌 3.求和案例_redux完整版

新增文件:

1.count_action.js 专门用于创建action对象

1
2
3
4
// 该文件专门为Count组件生成action对象
import { INCREMENT,DECREMENT} from './constant'
export const createIncrementAction = data => ({type:INCREMENT,data})
export const createDecrementAction = data => ({type:DECREMENT,data})

Count组件调用

1
2
3
4
5
6
7
8
9
10
11
12
13
14
15
16
17
18
19
20
21
22
23
24
25
26
27
28
29
30
31
32
33
34
35
36
37
38
39
40
41
42
43
44
45
46
47
48
49
50
51
52
53
54
55
56
57
58
59
60
import React, { Component } from 'react';
import store from '../../redux/store';
// 从action creators中引入两个函数,这两个函数用于生成对应的action对象
import {createIncrementAction,createDecrementAction} from '../../redux/count_action';

export default class Count extends Component {

// 当点击+按钮时触发
increment=()=>{
const {value} = this.selectNumber; // 从选择器中获取数值
// 调用store的dispatch方法,分发一个增加类型的action,并传递增加的数值
store.dispatch(createIncrementAction(value*1));
}

// 当点击-按钮时触发
decrement=()=>{
const {value} = this.selectNumber; // 从选择器中获取数值
// 调用store的dispatch方法,分发一个减少类型的action,并传递减少的数值
store.dispatch(createDecrementAction(value*1));
}

// 当点击'和为奇数再加'按钮时触发
increamjishu=()=>{
const {value} = this.selectNumber;
const count = store.getState();
// 判断当前状态数值是否为奇数,如果是奇数则进行加法操作
if (count % 2 !== 0) {
store.dispatch(createIncrementAction(value*1));
}
}

// 当点击'等一等再加'按钮时触发的异步操作
increamodd=()=>{
setTimeout(()=>{
const {value} = this.selectNumber;
// 延迟2秒后,进行加法操作
store.dispatch(createIncrementAction(value*1));
},2000)
}

render() {
return (
<div>
<h2>当前求和为:{store.getState()}</h2> {/* 显示当前的状态数值 */}
{/* 下面是一个选择器,用于选择要增加或减少的数值 */}
<select ref={c=>this.selectNumber=c}>
<option value="1">1</option>
<option value="2">2</option>
<option value="3">3</option>
</select>
{/* 下面是四个按钮,分别对应四种不同的操作 */}
<button onClick={this.increment}>+</button>
<button onClick={this.decrement}>-</button>
<button onClick={this.increamjishu}>和为奇数再加</button>
<button onClick={this.increamodd}>等一等再加</button>
</div>
);
}
}

2.constant.js 放置容易写错的type值

1
2
3
// 该模块是用于定义action对象中type类型的常量值,目的只有一个:便于管理的同时防止程序员单词写错
export const INCREMENT = 'increment'
export const DECREMENT = 'decrement'

注意:

哪里需要哪里引入,注意引入后的格式,如下:

1
2
3
4
// 该文件专门为Count组件生成action对象
import { INCREMENT,DECREMENT} from './constant'
export const createIncrementAction = data => ({type:INCREMENT,data})
export const createDecrementAction = data => ({type:DECREMENT,data})

📌 4.求和案例_redux异步action版

1.明确:延迟的动作不想交给组件自身,想交给action

2.何时需要异步action:想要对状态进行操作,但是具体的数据靠异步任务返回。

3.具体编码:

  • yarn add redux-thunk,并配置在store中
  • 创建action的函数不再返回一般对象,而是一个函数,该函数中写异步任务。
  • 异步任务有结果后,分发一个同步的action去真正操作数据。

store.js中配置

1
2
3
4
5
6
7
8
9
10
11
12
/* 
该文件专门用于暴露一个store对象,整个应用只有一个store对象
*/
//引入createStore,专门用于创建redux中最为核心的store对象
// applyMiddleware用于执行中间件
import { legacy_createStore as createStore,applyMiddleware} from 'redux'
// 引入redux-thunk中间件,用于支持异步action
import thunk from 'redux-thunk'
//引入为Count组件服务的reducer
import countReducer from './count_reducer'
//暴露store
export default createStore(countReducer,applyMiddleware(thunk))

count_action.js创建异步action

1
2
3
4
5
6
7
8
9
10
11
12
13
14
// 该文件专门为Count组件生成action对象
import { INCREMENT,DECREMENT} from './constant'
// 同步action,就是指action的值为Obiect类型的一般对象
export const createIncrementAction = data => ({type:INCREMENT,data})
export const createDecrementAction = data => ({type:DECREMENT,data})
// 异步action,就是指action的值为函数,异步action中一般都会调用同步action,
// 异步action不是必须要用的,也可以在组件中写定时器,实现异步action
export const createIncrementAsyncAction = (data,time)=>{
return (dispatch)=>{
setTimeout(()=>{
dispatch(createIncrementAction(data))
},time)
}
}

Count组件中引用

1
2
3
4
5
6
7
8
9
10
11
12
13
14
15
16
17
18
19
20
21
22
23
24
25
26
27
28
29
30
31
32
33
34
35
36
37
38
39
40
41
42
43
44

import React, { Component } from 'react'
import store from '../../redux/store'
import {createIncrementAction,createDecrementAction,createIncrementAsyncAction} from '../../redux/count_action'
export default class Count extends Component {

increment=()=>{
const {value} = this.selectNumber
store.dispatch(createIncrementAction(value*1))
}
decrement=()=>{
const {value} = this.selectNumber
store.dispatch(createDecrementAction(value*1))
}
increamjishu=()=>{
const {value} = this.selectNumber
const count = store.getState()
if (count % 2 !== 0) {
store.dispatch(createIncrementAction(value*1))
}
}
increamodd=()=>{
// setTimeout(()=>{
const {value} = this.selectNumber
store.dispatch(createIncrementAsyncAction(value*1,2000))
// },2000)
}
render() {
return (
<div>
<h2>当前求和为:{store.getState()}</h2><br></br>
<select ref={c=>this.selectNumber=c}>
<option value="1">1</option>
<option value="2">2</option>
<option value="3">3</option>
</select>
<button onClick={this.increment}>+</button>
<button onClick={this.decrement}>-</button>
<button onClick={this.increamjishu}>和为奇数再加</button>
<button onClick={this.increamodd}>等一等再加</button>
</div>
)
}
}

4.备注:异步action不是必须要写的,完全可以自己等待异步任务的结果了再去分发同步action。

📌 5.Recat-redux

原理图:

原理图

理解:

  • React-Redux 是一个用于简化 React 应用中使用 Redux 的插件库。

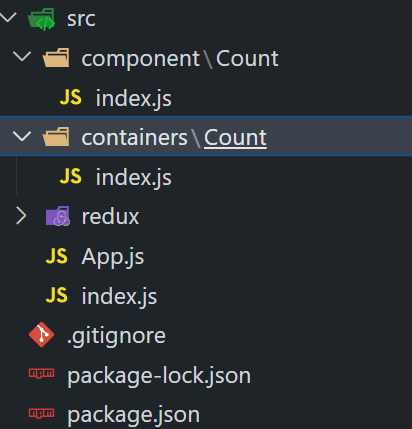
React-Redux将所有组件分成两大类:

  • 🎨 UI组件:

    • 只负责呈现精美的用户界面,不包含业务逻辑。
    • 通过 props 接收数据(通常是数据和函数)。
    • 不使用任何 Redux 的 API。
    • 通常保存在 components 文件夹下。
  • 📦 容器组件:

    • 负责管理数据和业务逻辑,不负责UI的呈现。
    • 使用 Redux 的 API。
    • 通常保存在 containers 文件夹下,以确保项目结构的美观性。

相关API

  1. Provider 🏛️:
    • Provider 组件允许您的整个React应用访问Redux的状态数据(state)。它是React-Redux的核心组件,通过它,所有子组件都能获得Redux的状态数据。
      1
      2
      3
      <Provider store={store}>
      <App />
      </Provider>
  2. connect 🔄:
    • connect 是一个函数,用于将UI组件包装成容器组件。它是React-Redux的一个关键API,用于连接Redux的状态和操作到React组件。
      1
      2
      3
      4
      5
      import { connect } from 'react-redux'
      connect(
      mapStateToprops,
      mapDispatchToProps
      )(Counter)
  3. mapStateToProps 🌐:
    • mapStateToProps 是一个函数,用于将Redux的状态数据(state对象)映射到UI组件的props属性上。通过这个函数,您可以选择将Redux中的哪些数据传递给UI组件。
      1
      2
      3
      4
      5
      const mapStateToprops = function (state) {
      return {
      value: state
      }
      }
  4. mapDispatchToProps 🚀:
    • mapDispatchToProps 是一个函数,用于将分发Redux actions的函数映射到UI组件的props属性上。通过这个函数,您可以定义哪些操作可以在UI组件中触发Redux actions。

这些API是React-Redux中非常重要的部分,它们有助于将React组件与Redux状态管理相结合,以创建强大的应用程序。

使用上redux调试工具

1.安装chrome浏览器插件
原理图
2.下载工具依赖包

1
npm install --save-dev redux-devtools-extension

纯函数和高阶函数

纯函数

  1. 概念

    • 纯函数是一类特殊的函数,其特点是对于相同的输入(实参),必定会得到相同的输出(返回值)。
    • 纯函数不会产生副作用,不会改写参数数据,不会进行网络请求,不会与输入和输出设备交互,也不会调用不纯的方法,如Date.now()Math.random()
  2. 示例

    • 一个简单的纯函数示例是求和函数,给定相同的两个整数作为输入,总是返回相同的和,而且没有副作用。

高阶函数

  1. 概念

    • 高阶函数是一类特殊的函数,其特点是要么接受函数作为参数,要么返回一个函数作为结果。
    • 高阶函数可以实现更加动态和可扩展的功能,使代码更加灵活和复用。
  2. 常见高阶函数

    • 定时器设置函数:setTimeout, setInterval等。
    • 数组方法:forEach(), map(), filter(), reduce(), find(), bind()等。
    • Promise:then(), catch(), finally()等。
    • React-Redux中的connect函数:用于连接React组件与Redux状态管理。
  3. 作用

    • 高阶函数可以用于实现更加动态和可扩展的功能。它们允许你将功能封装为函数,以便在不同的上下文中使用,提高代码的可维护性和可扩展性。

总之,纯函数是一类特殊的函数,它们具有固定的输入和输出,不会引起副作用。高阶函数是一种特殊的函数,可以接受或返回其他函数,用于增强代码的灵活性和可扩展性。它们都在编程中起着重要的作用,特别是在函数式编程和现代前端开发中。

📌 6.求和案例_react-redux基本使用

1.明确两个概念:

  • UI组件:不能使用任何reduxapi,只负责页面的呈现、交互等。
  • 容器组件:负责和redux通信,将结果交给UI组件。

2.如何创建一个容器组件————靠react-reduxconnect函数

  • connect(mapStateToProps,mapDispatchToProps)(UI组件)
  • -mapStateToProps:映射状态,返回值是一个对象
  • -mapDispatchToProps:映射操作状态的方法,返回值是一个对象

3.备注

  • 容器组件中的store是靠props传进去的,而不是在容器组件中直接引入
  • mapDispatchToProps,也可以是一个对象,当接收到的mapDispatchToProps是一个对象时,action自动调用dispatch

求和案例

创建containers文件夹的同时,创建Count容器

1.在App.js中引入Count容器

1
2
3
4
5
6
7
8
9
10
11
12
13
import React, { Component } from 'react'
import Count from './containers/Count'
import store from './redux/store'
export default class App extends Component {
render() {
return (
<div>
{/* 给容器组件传递store */}
<Count store={store}></Count>
</div>
)
}
}

2.在containers使用connect()()创建并暴露一个Count的容器组件

1
2
3
4
5
6
7
8
9
10
11
12
13
14
15
16
17
18
19
20
21
22
23
24
25
26
27
// 引入Count
import Count from "../../component/Count";
import {createIncrementAction,createDecrementAction,createIncrementAsyncAction} from '../../redux/count_action'
// 引入connect用于连接UI组件与redux
import { connect } from "react-redux";

// a函数返回的对象中的key就作为传递给UIT组件props的key,
// value就作为传递给UT组件props的value----状态
function mapStateToProps(state){
return {count:state}
}
// a函数返回的对象中的key就作为传递给UIT组件props的key,
// value就作为传递给UT组件props的value----操作方法
function mapDispatchToProps(dispatch){
return {
jia:(data)=>{
dispatch(createIncrementAction(data));
},
jian:(data)=>{
dispatch(createDecrementAction(data))
},
jiaAsync:(data,time)=>{
dispatch(createIncrementAsyncAction(data,time))
}}
}
//使用connect()()创建并暴露一个Count的容器组件
export default connect(mapStateToProps,mapDispatchToProps)(Count)

优化版本

1
2
3
4
5
6
7
8
9
10
11
12
13
14
15
16
17
18
19
20
21
22
23
24
25
26
27
28
29
30
31
32
33
34
35
36
37
// 引入Count
import Count from "../../component/Count";
import {createIncrementAction,createDecrementAction,createIncrementAsyncAction} from '../../redux/count_action'
// 引入connect用于连接UI组件与redux
import { connect } from "react-redux";

// value就作为传递给UT组件props的value----状态
// mapStateToProps = state => ({count:state})
// value就作为传递给UT组件props的value----操作方法
// mapDispatchToProps=dispatch=>
// ({
// jia:(data)=>{
// dispatch(createIncrementAction(data));
// },
// jian:(data)=>{
// dispatch(createDecrementAction(data))
// },
// jiaAsync:(data,time)=>{
// dispatch(createIncrementAsyncAction(data,time))
// }})
//使用connect()()创建并暴露一个Count的容器组件
export default connect(
state => ({count:state}),
// mapDispatchToProps的一般写法
// dispatch=>
// ({
// jia:data=>dispatch(createIncrementAction(data)),
// jian:data=>dispatch(createDecrementAction(data)),
// jiaAsync:(data,time)=>dispatch(createIncrementAsyncAction(data,time))
// })
// mapDispatchToProps的简写
{
jia:createIncrementAction,
jian:createDecrementAction,
jiaAsync:createIncrementAsyncAction
}
)(Count)

3.在CountUI组件中通过Props读取并调用

1
2
3
4
5
6
7
8
9
10
11
12
13
14
15
16
17
18
19
20
21
22
23
24
25
26
27
28
29
30
31
32
33
34
35
36
37
38
39
40

import React, { Component } from 'react'
export default class Count extends Component {

increment=()=>{
const {value} = this.selectNumber
this.props.jia(value*1)
}
decrement=()=>{
const {value} = this.selectNumber
this.props.jian(value*1)
}
increamjishu=()=>{
const {value} = this.selectNumber
if (this.props.count %2 !==0) {
this.props.jia(value*1)
}
}
increamodd=()=>{
const {value} = this.selectNumber
this.props.jiaAsync(value*1,2000)
}
render() {
// console.log("CountUI组件接收到的",this.props);
return (
<div>
<h2>当前求和为:{this.props.count}</h2><br></br>
<select ref={c=>this.selectNumber=c}>
<option value="1">1</option>
<option value="2">2</option>
<option value="3">3</option>
</select>
<button onClick={this.increment}>+</button>
<button onClick={this.decrement}>-</button>
<button onClick={this.increamjishu}>和为奇数再加</button>
<button onClick={this.increamodd}>等一等再加</button>
</div>
)
}
}

Provider的用法

<Provider> 是 React-Redux 中的一个核心组件,它的作用是用于包装整个 React 应用,以便所有组件都能够访问 Redux 的状态数据。

具体作用包括:

  1. 传递 Redux Store<Provider> 接受一个 store 属性,通过这个属性,它将 Redux 的 store 传递给整个应用。这意味着所有通过 <Provider> 包装的组件都能够访问到 Redux 的 store。

  2. 自动监听状态变化<Provider> 内部会自动监听 Redux store 的状态变化。当状态发生变化时,它会自动通知所有连接到 Redux store 的组件,以便它们可以更新界面以反映最新的状态。

  3. 简化组件嵌套:使用 <Provider> 可以避免将 Redux store 通过 props 一级一级手动传递给每个组件。这可以显著减少组件嵌套和简化代码。

  4. 提供统一的状态管理<Provider> 使应用程序的状态管理变得一致和可预测。所有连接到 Redux store 的组件都共享相同的状态树,这有助于更好地组织和管理应用的状态。

总之,<Provider> 是 React-Redux 中的一个重要组件,它用于将 Redux store 注入整个应用,使状态管理更加方便和一致。这有助于构建可维护和可扩展的 React 应用程序。

1
2
3
4
5
6
7
8
9
10
11
12
13
14
15
16
17
18
19
20
21
22
23
24
25
26
27
28
29
30
31
//引入react核心库
import React from 'react'
//引入ReactDOM
import ReactDOM from 'react-dom/client';
import { BrowserRouter} from 'react-router-dom/cjs/react-router-dom'
//引入App
import App from './App'
import store from './redux/store';
import { Provider } from 'react-redux';
const root = ReactDOM.createRoot(document.getElementById('root'));

root.render(
<React.StrictMode>
<BrowserRouter>
<Provider store={store}>
<App />
</Provider>
</BrowserRouter>
</React.StrictMode>
);
// 监测redux中状态的改变,如redux的状态发生了改变,
// 那么重新渲染App组件,当使用react-redux时就不需要监测了
// store.subscribe(()=>{
// root.render(
// <React.StrictMode>
// <BrowserRouter>
// <App />
// </BrowserRouter>
// </React.StrictMode>
// );
// })

📌 7.求和案例_react-redux优化
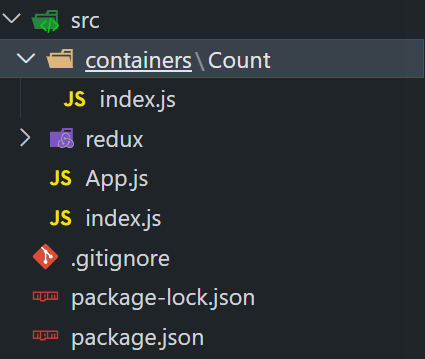
  1. 容器组件和UI组件整合一个文件:

    • React-Redux中,您可以将容器组件和UI组件整合到同一个文件中,以提高项目的组织和可维护性。
  2. 无需自己给容器组件传递store:

    • 通过包裹 <App/> 组件的 <Provider store={store}>,您无需手动传递store给容器组件,React-Redux会自动处理。
  3. 不再需要手动检测Redux状态的变化:

    • 使用React-Redux后,容器组件可以自动监听Redux状态的变化,无需手动检测。这大大简化了状态管理的工作。
  4. mapDispatchToProps 简化写法:

    • 您可以将mapDispatchToProps简化为一个对象,而不必编写函数。这使代码更加简洁。
  5. 与Redux打交道的步骤:

    • 一个组件要与Redux进行交互,通常需要以下步骤:
      (1). 定义好UI组件,但不暴露它。
      (2). 引入 connect 函数生成一个容器组件并暴露它。写法如下:
      1
      2
      3
      4
      connect(
      state => ({ key: value }), // 映射状态
      { key: xxxxxAction } // 映射操作状态的方法
      )(UI组件)
      (3). 在UI组件中,通过 this.props.xxxxxxx 读取和操作状态,然后重新排版组件。

注意:

(1).所有变量名字要规范,尽量触发对象的简写形式。
(2).reducers文件夹中,编写index.js专门用于汇总并暴露所有的reducer

通过这些步骤,您可以有效地将React组件与Redux状态管理集成在一起,以创建高效且易于维护的应用程序。

整合求和案例的Count组件与Count容器

1
2
3
4
5
6
7
8
9
10
11
12
13
14
15
16
17
18
19
20
21
22
23
24
25
26
27
28
29
30
31
32
33
34
35
36
37
38
39
40
41
42
43
44
45
46
47
48
49
50
51
52
53
54
55
// 引入React
import React, { Component } from 'react'
import {createIncrementAction,createDecrementAction,createIncrementAsyncAction} from '../../redux/count_action'
// 引入connect用于连接UI组件与redux
import { connect } from "react-redux";
// CountUI组件
class Count extends Component {

increment=()=>{
const {value} = this.selectNumber
this.props.jia(value*1)
}
decrement=()=>{
const {value} = this.selectNumber
this.props.jian(value*1)
}
increamjishu=()=>{
const {value} = this.selectNumber
if (this.props.count %2 !==0) {
this.props.jia(value*1)
}
}
increamodd=()=>{
const {value} = this.selectNumber
this.props.jiaAsync(value*1,2000)
}
render() {
// console.log("CountUI组件接收到的",this.props);
return (
<div>
<h2>当前求和为:{this.props.count}</h2><br></br>
<select ref={c=>this.selectNumber=c}>
<option value="1">1</option>
<option value="2">2</option>
<option value="3">3</option>
</select>
<button onClick={this.increment}>+</button>
<button onClick={this.decrement}>-</button>
<button onClick={this.increamjishu}>和为奇数再加</button>
<button onClick={this.increamodd}>等一等再加</button>
</div>
)
}
}

//使用connect()()创建并暴露一个Count的容器组件
export default connect(
state => ({count:state}),
{
jia:createIncrementAction,
jian:createDecrementAction,
jiaAsync:createIncrementAsyncAction
}
)(Count)

📌 8.求和案例react-redux数据共享

案例效果图

Gitee地址

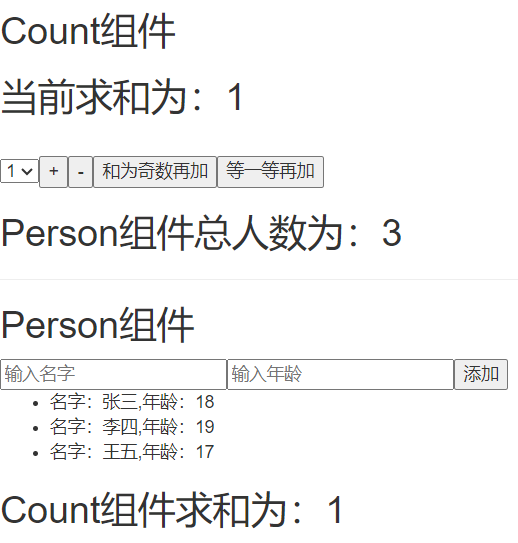
1.定义一个Pserson组件,和Count组件通过redux共享数据。
2.为Person组件编写:reduceraction,配置constant常量。
3.重点:Person`reducerCountReducer要使用combineReducers进行合并,合并后的总状态是一个对象!!!
4.交给store的是总reducer,最后注意在组件中取出状态的时候,记得“取到位”。

📌 9.react-redux开发者工具的使用

1.安装

1
npm i redux-devtools-extension

2.store中进行配置

1
2
3
4
5
6
7
8
9
10
11
12
13
14
15
16
17
18
19
/* 
该文件专门用于暴露一个store对象,整个应用只有一个store对象
*/
//引入createStore,专门用于创建redux中最为核心的store对象
// applyMiddleware用于执行中间件
import { legacy_createStore as createStore,applyMiddleware,combineReducers} from 'redux'
// 引入redux-thunk中间件,用于支持异步action
import thunk from 'redux-thunk'
//引入为Count组件服务的reducer
import countReducer from './reducer/count'
// 引入redux-devtools-extension
import {composeWithDevTools} from 'redux-devtools-extension'
//引入为Person组件服务的reducer
import personReducer from './reducer/person'
// 合并所有Reducer
const alLAction=combineReducers({count:countReducer,persons:personReducer})
//暴露store
export default createStore(alLAction,composeWithDevTools(applyMiddleware(thunk)))

📌 10.reac项目打包

  1. 使用项目的打包命令:

    1
    npm run build
  2. 部署打包后的文件 build,您有两种选择:

    2.1. 自己编写服务器(Node.js或Java):

    • 您可以创建一个自定义的服务器来托管打包后的文件 build
    • 这需要您编写相应的服务器端代码,以便浏览器可以访问您的应用程序。

    2.2. 使用 serve 库进行快速搭建服务器:

    • 安装 serve 库(如果未安装):

      1
      npm i serve -g
    • 在命令行中运行以下命令,以快速搭建服务器并托管打包后的文件 build

      1
      serve build

    这将在端口上启动一个简单的静态文件服务器,允许您通过浏览器访问您的应用程序。

这样,您可以选择自己编写服务器或使用 serve 库来部署您的打包文件。