
JSApi前四天学习总结
第一天学习
1. getElementById获取元素
1 |
|
2. getElementsByTagName获取某些元素
1 |
|
3. H5新增获取元素方式
1 |
|
4. 获取特殊元素
1 |
|
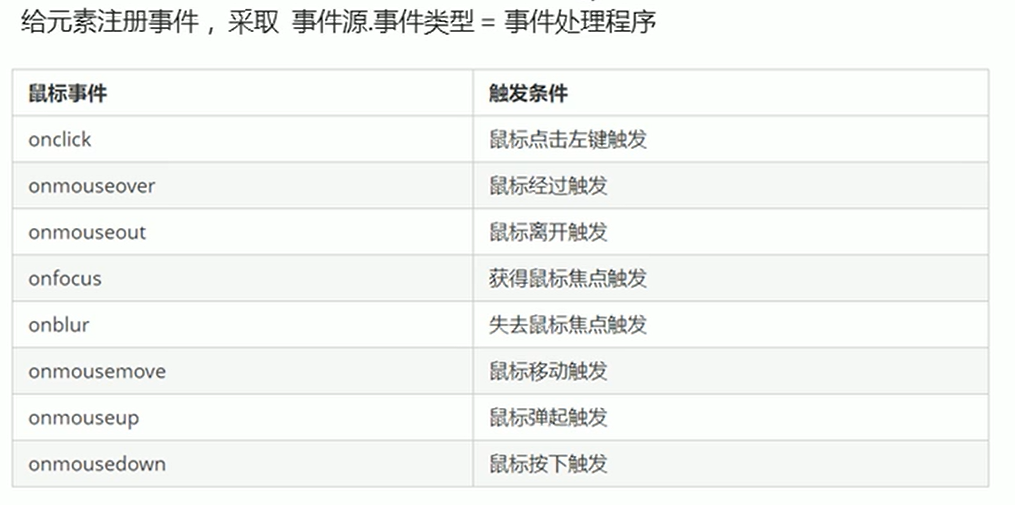
5. 绑定事件三要素
1 |
|
6. 事件执行步骤
1 |
|
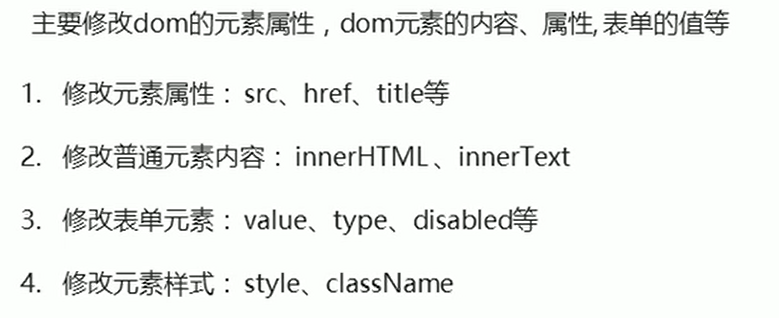
7. 操作元素之改变元素内容
1 |
|
8. innerText和innerHTML的区别
1 |
|
9. 操作元素之改变元素属性
1 |
|
10. 分时问候并显示不同图片案例
1 |
|
11. 操作元素之表单属性设置
1 |
|
12. 仿京东显示隐藏密码
1 |
|
13. 操作元素之修改样式属性
1 |
|
关闭淘宝二维码案例
1 |
|
14. 循环精灵图的使用
1 |
|
15. 显示隐藏文本框内容
1 |
|
16. 通过className改变元素样式
1 |
|
仿新浪注册页面案例
1 |
|
开关灯案例
1 |
|
第二天学习
01-排他思想(算法)
1 |
|
02-百度换肤效果
1 |
|
03-表格隔行变色
1 |
|
4-全选反选
1 |
|
05-自定义属性操作
1 |
|
06-tap栏切换操作
1 |
|
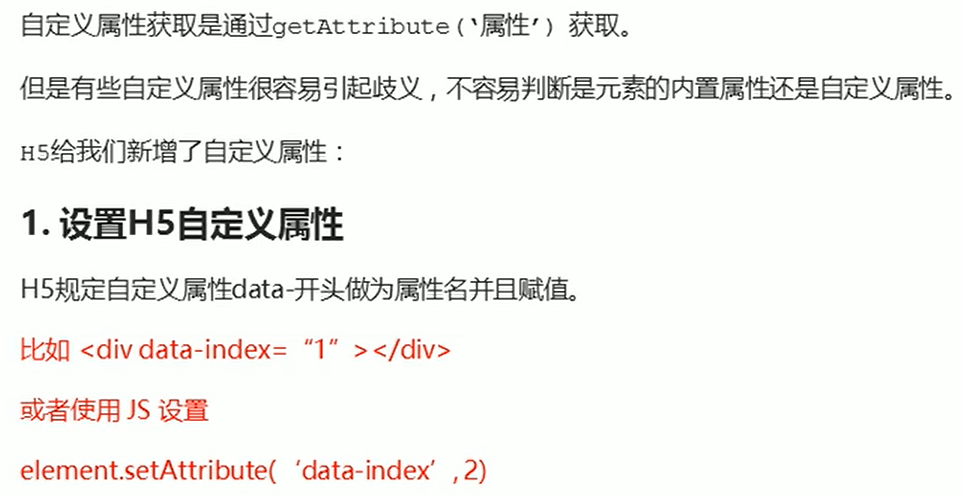
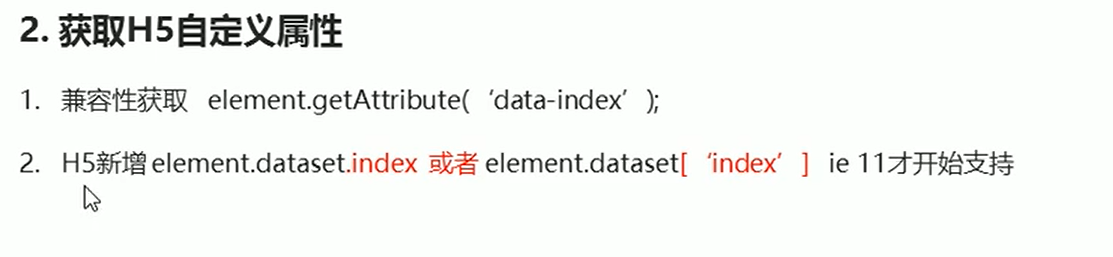
07-H5自定义属性
自定义属性的目的:
是为了保存并使用数据,有些数据可以保存到页面中而不用保存到数据库中.
1 |
|
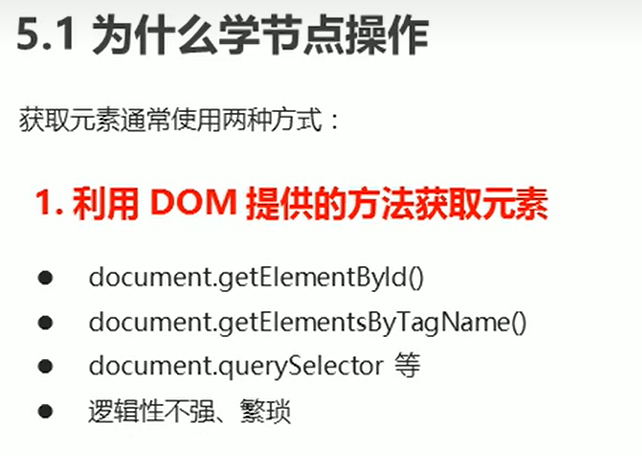
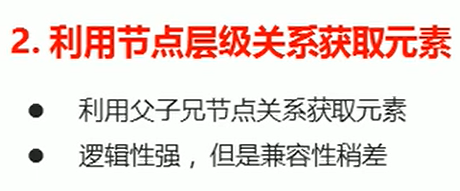
08-节点概述
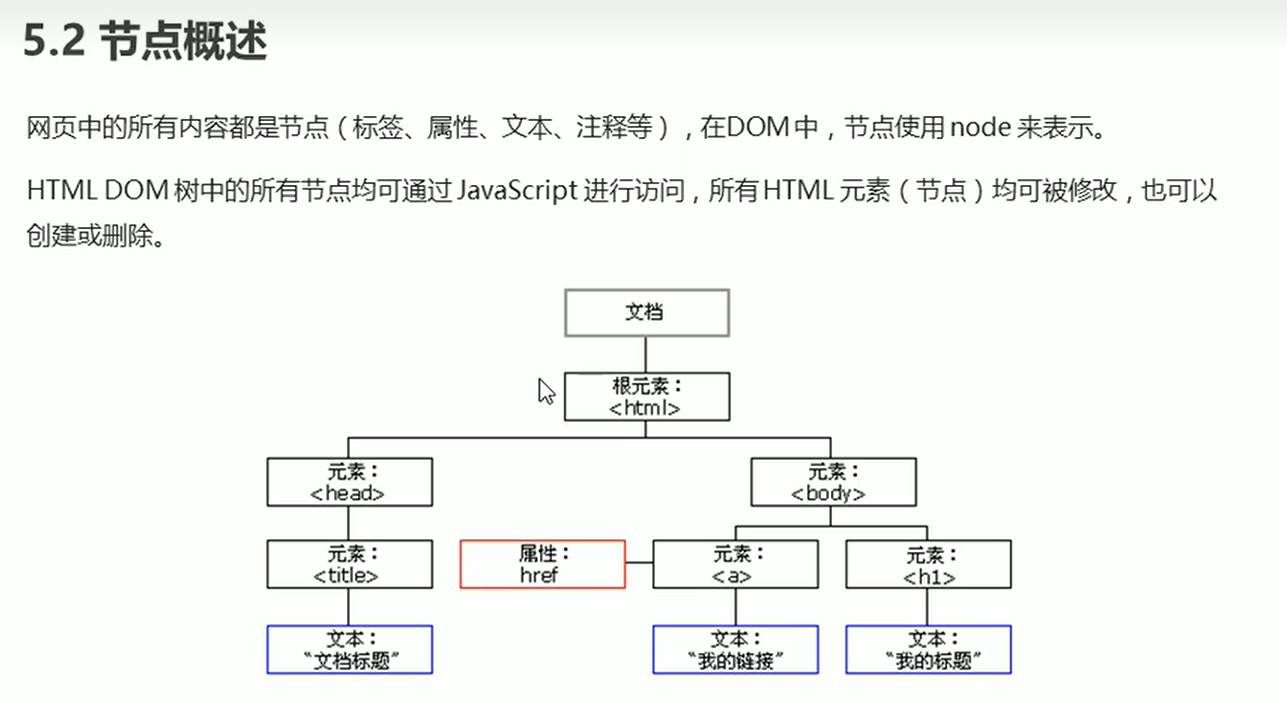
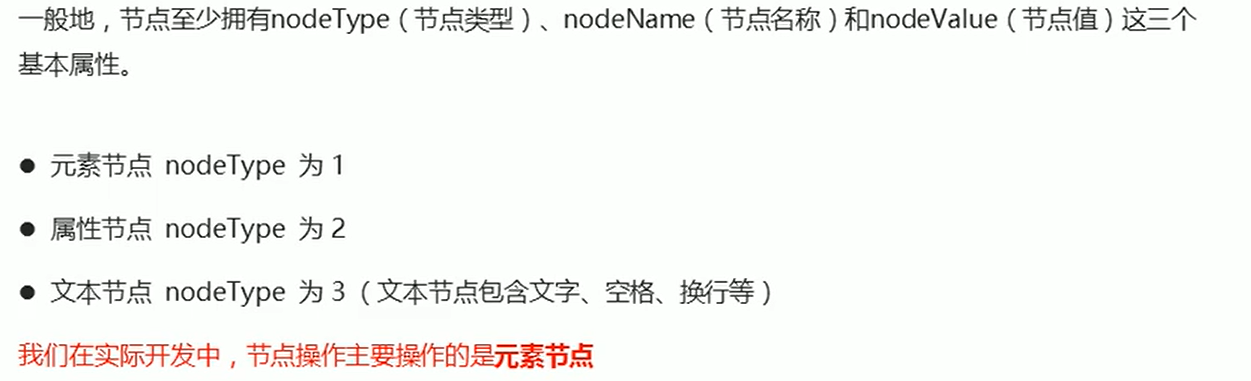
1 |
|
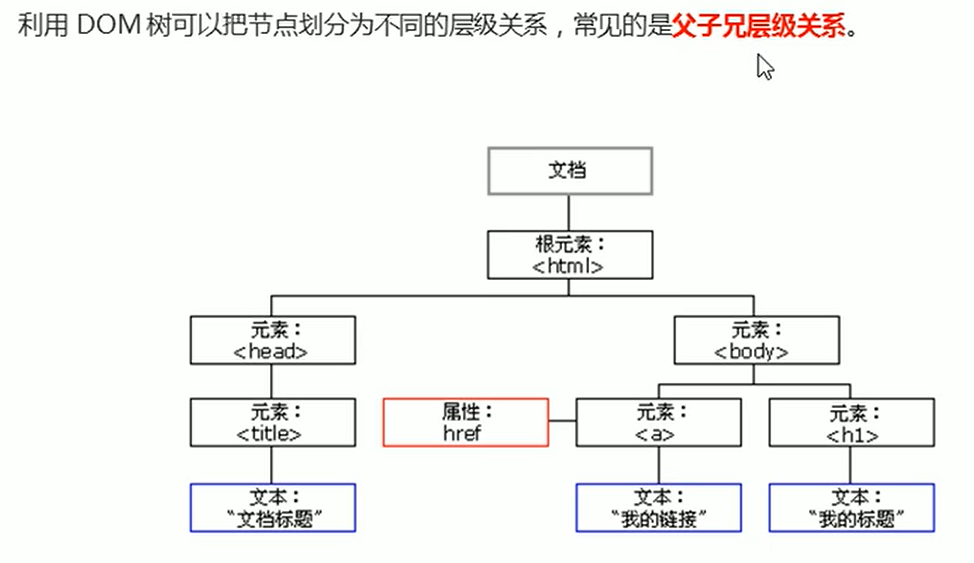
09-父节点操作
1 |
|
10-子节点操作
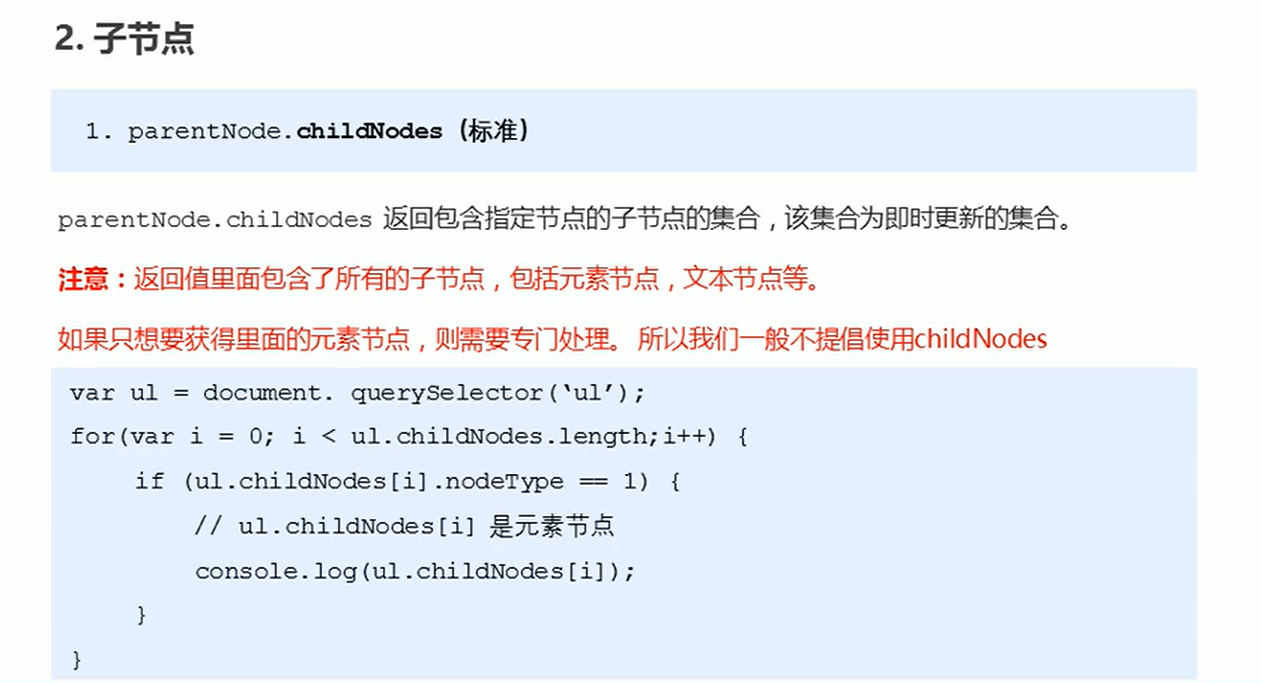
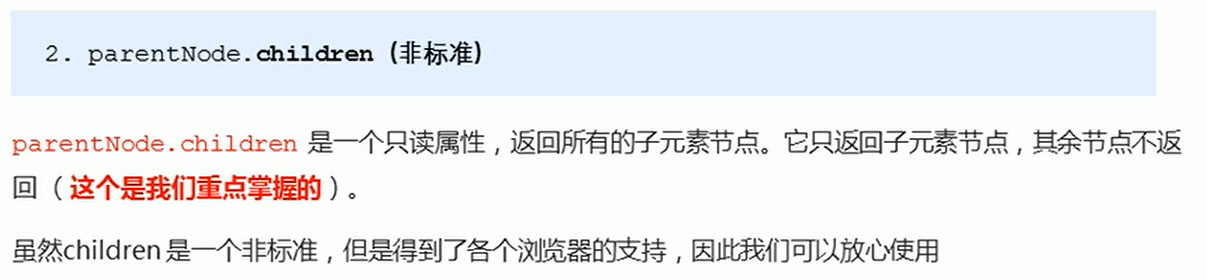
1 |
|
11-子节点第一个子元素和最后一个子元素
1 |
|
新浪微博下拉菜单案例
1 |
|
12-兄弟节点
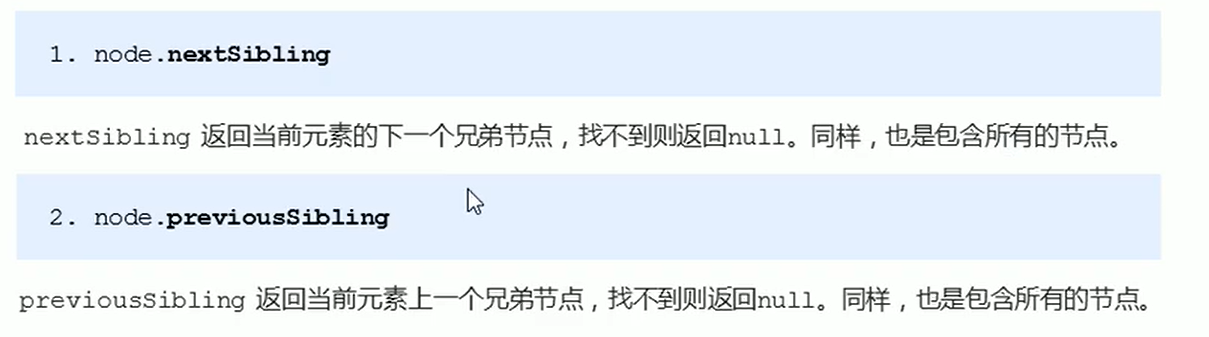


1 |
|
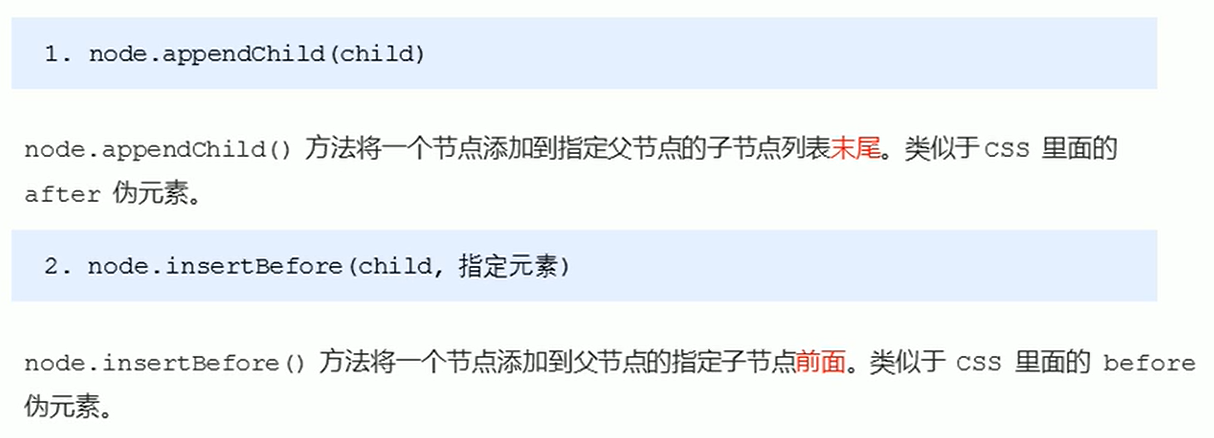
13-创建和添加节点

1 |
|
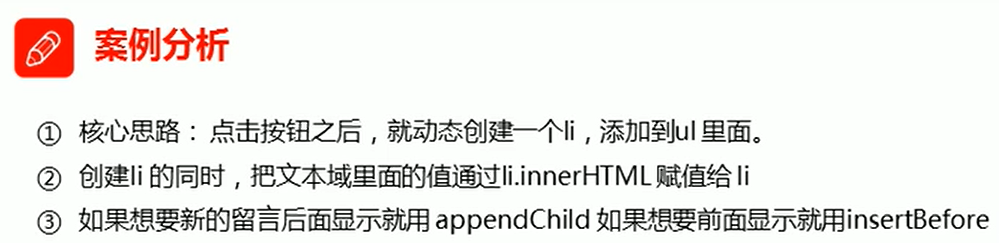
简单版发布留言板案例
1 |
|
第三天
01-节点操作之删除节点

1 |
|
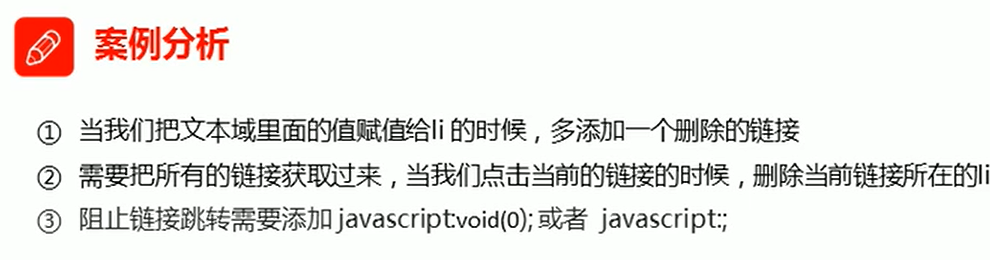
删除留言案例
1 |
|
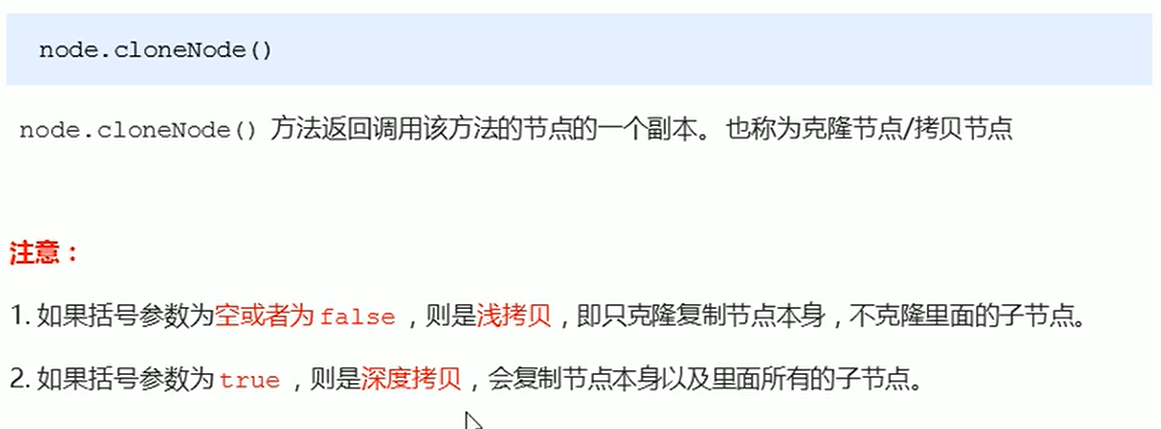
02-节点操作之克隆节点
1 |
|
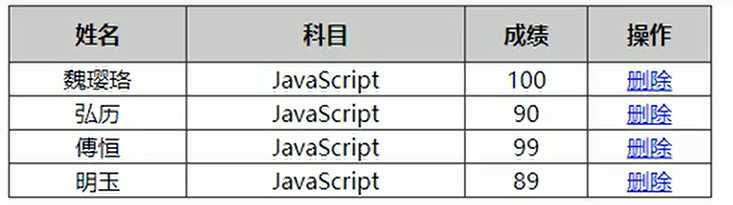
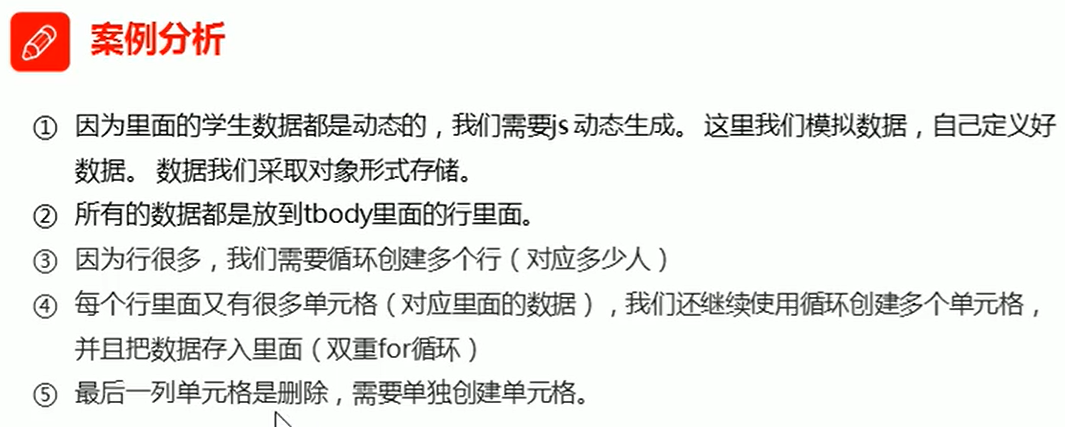
动态生成表格案例
1 |
|
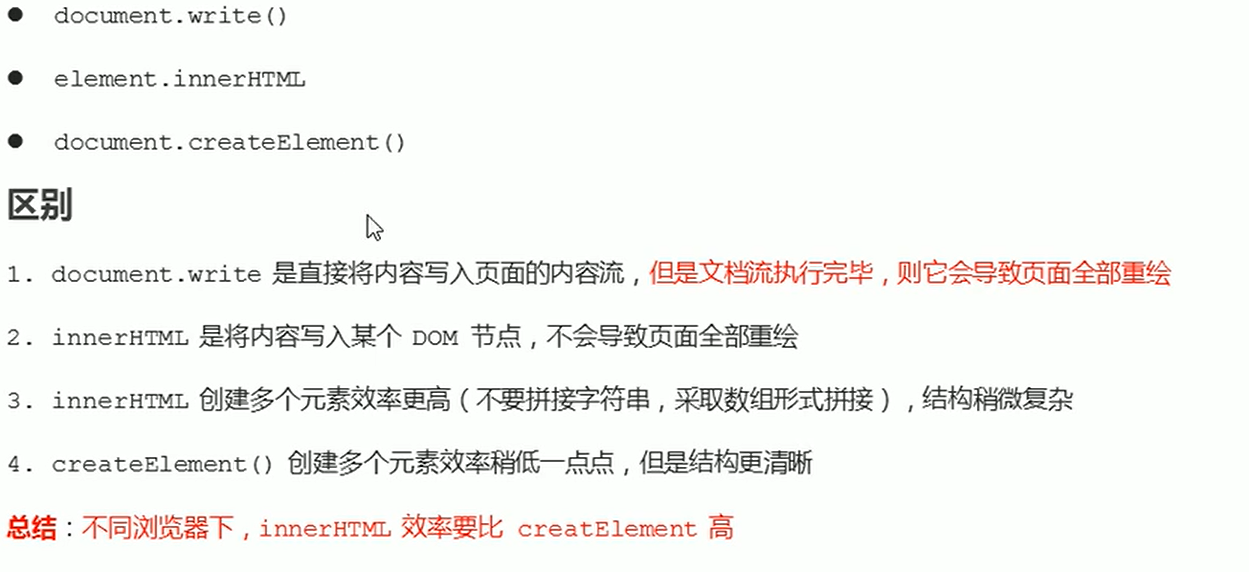
03-三种创建元素方式区别
1 |
|
04-innerHTML拼接效率测试
1 |
|
05-innerHTML数组效率测试
1 |
|
06-createElement效率测试
1 |
|
DOM重点核心
关于dom操作,我们主要针对于元素的操作。主要有创建,增、删、改、查、属性操作、事件操作。
- 创建
- document.write
- innerHTML
- createElement 注:这三种区别见03
- 增
- appendChild (在元素后面增加元素)
- insertBefore (在元素前面添加元素)
- 删
- removeChild
改

查
属性操作
事件操作


07-注册事件的两种方式
1.1 注册事件概述
- 给元素添加事件,称为
注册事件或者绑定事件。
- 给元素添加事件,称为
- 注册事件有两种方式:
传统方式和方法监听注册方式
- 注册事件有两种方式:
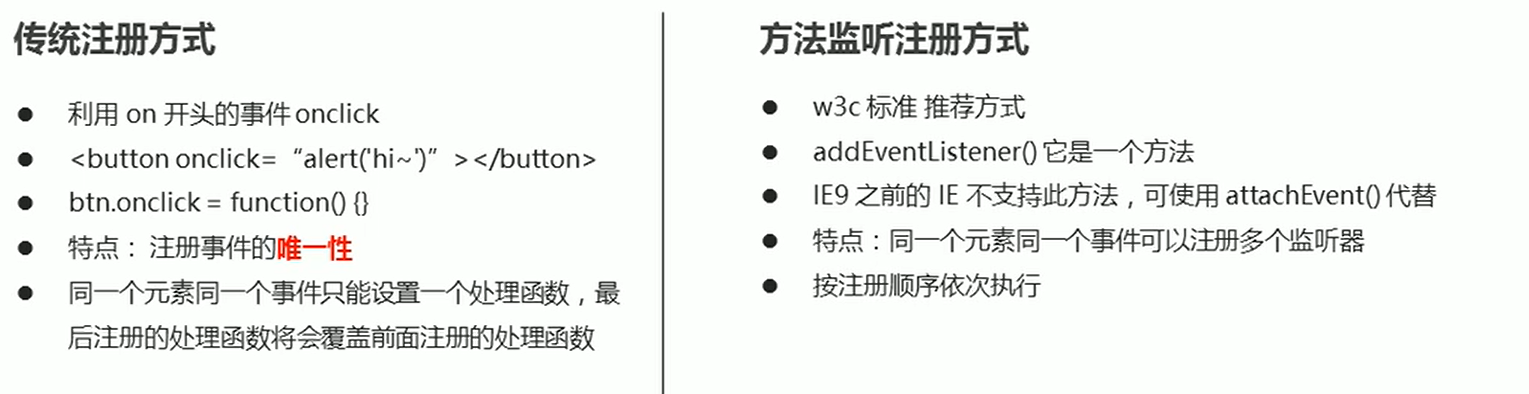
1.2 addEventListener 事件监听方式
1.3 attachEvent 事件监听方式 (了解就行)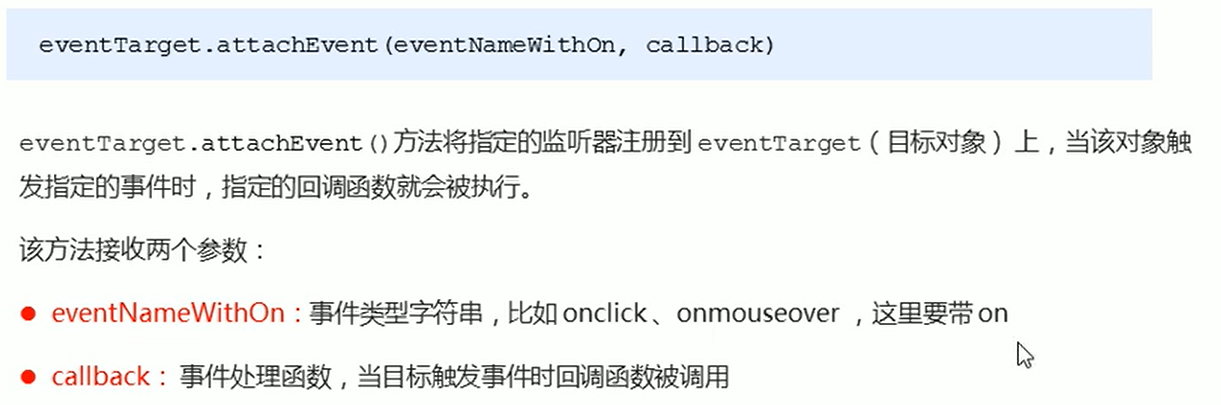
1.4 注册事件兼容性解决方案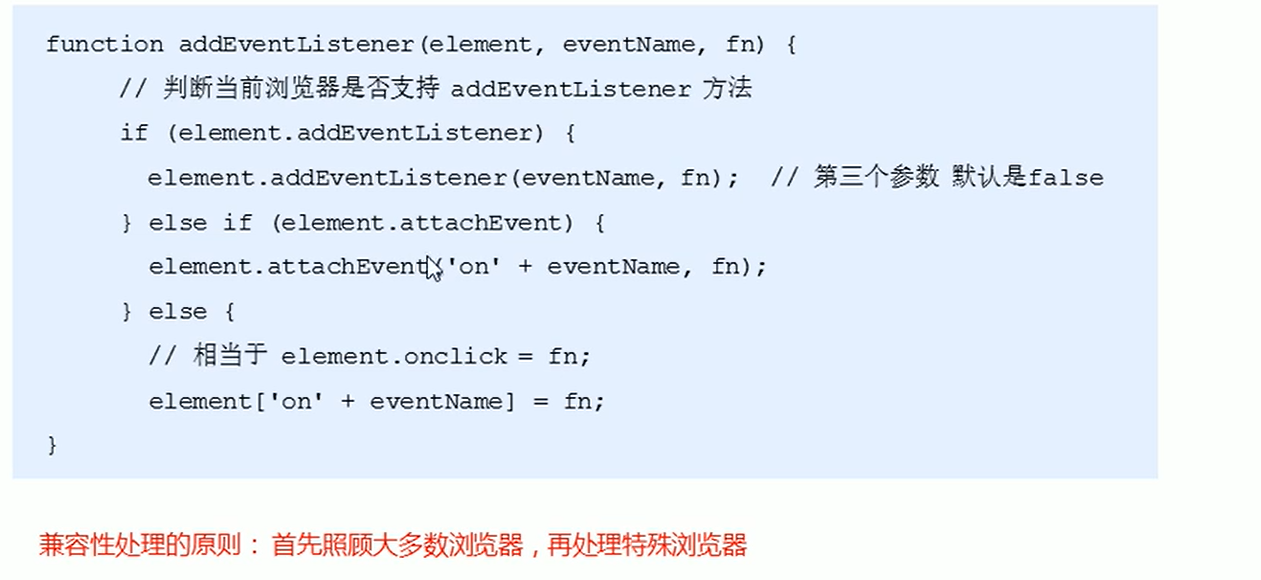
代码:1
2
3
4
5
6
7
8
9
10
11
12
13
14
15
16
17
18
19
20
21
22
23
24
25
26
27
28
29
30
31
32
33
34
35
36
37
38
39
40
<html lang="en">
<head>
<meta charset="UTF-8">
<meta name="viewport" content="width=device-width, initial-scale=1.0">
<meta http-equiv="X-UA-Compatible" content="ie=edge">
<title>Document</title>
</head>
<body>
<button>传统注册事件</button>
<button>方法监听注册事件</button>
<button>ie9 attachEvent</button>
<script>
var btns = document.querySelectorAll('button');
// 1. 传统方式注册事件
btns[0].onclick = function() {
alert('hi');
}
btns[0].onclick = function() {
alert('hao a u');
}
// 2. 事件侦听注册事件 addEventListener
// (1) 里面的事件类型是字符串 必定加引号 而且不带on
// (2) 同一个元素 同一个事件可以添加多个侦听器(事件处理程序)
btns[1].addEventListener('click', function() {
alert(22);
})
btns[1].addEventListener('click', function() {
alert(33);
})
// 3. attachEvent ie9以前的版本支持
btns[2].attachEvent('onclick', function() {
alert(11);
})
</script>
</body>
</html>
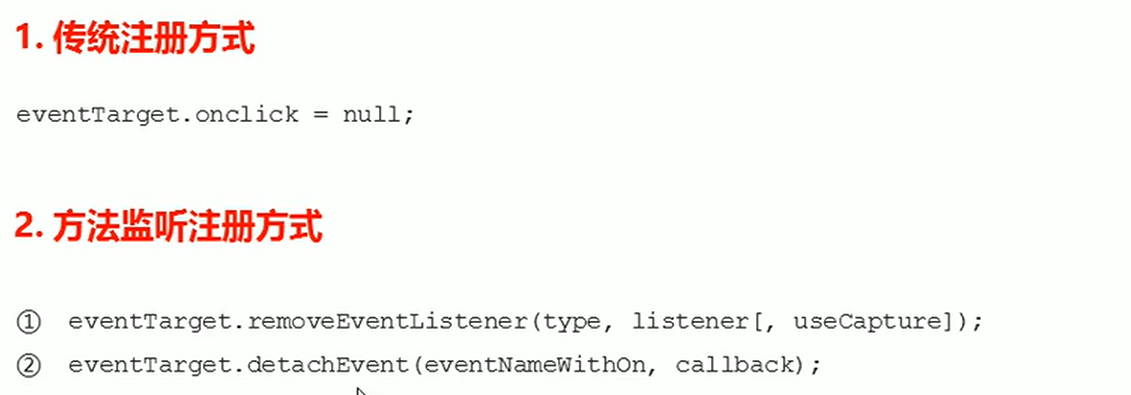
08-删除事件(解绑事件)
删除事件的两种方式
删除事件兼容性解决方案

代码:1
2
3
4
5
6
7
8
9
10
11
12
13
14
15
16
17
18
19
20
21
22
23
24
25
26
27
28
29
30
31
32
33
34
35
36
37
38
39
40
41
42
43
44
45
46
<html lang="en">
<head>
<meta charset="UTF-8">
<meta name="viewport" content="width=device-width, initial-scale=1.0">
<meta http-equiv="X-UA-Compatible" content="ie=edge">
<title>Document</title>
<style>
div {
width: 100px;
height: 100px;
background-color: pink;
}
</style>
</head>
<body>
<div>1</div>
<div>2</div>
<div>3</div>
<script>
var divs = document.querySelectorAll('div');
divs[0].onclick = function() {
alert(11);
// 1. 传统方式删除事件
divs[0].onclick = null;
}
// 2. removeEventListener 删除事件
divs[1].addEventListener('click', fn) // 里面的fn 不需要调用加小括号
function fn() {
alert(22);
divs[1].removeEventListener('click', fn);
}
// 3. detachEvent
divs[2].attachEvent('onclick', fn1);
function fn1() {
alert(33);
divs[2].detachEvent('onclick', fn1);
}
</script>
</body>
</html>
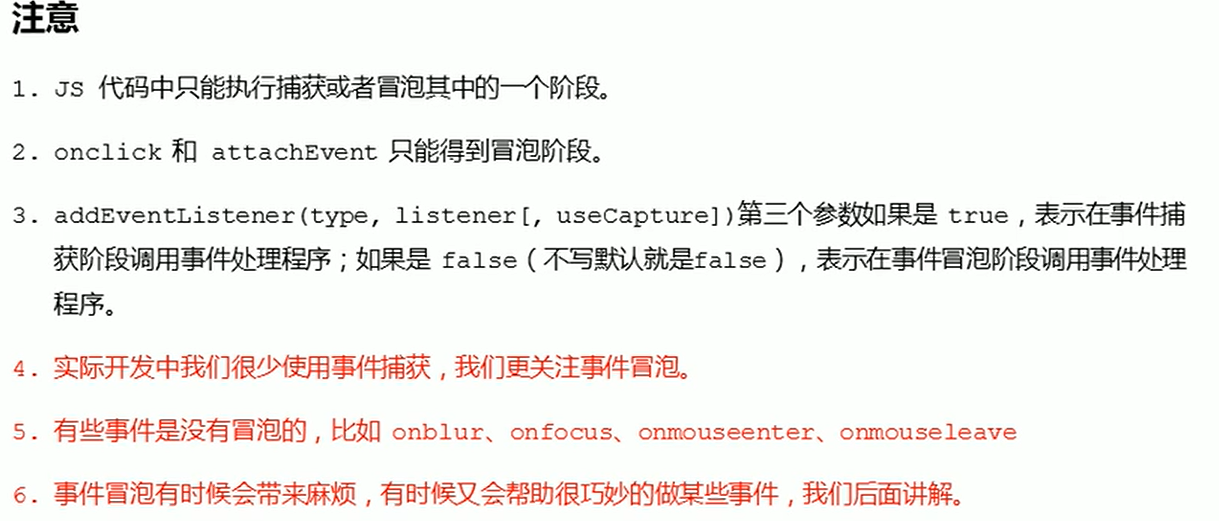
09-DOM事件流三个阶段
DOM事件流概述
事件流 描述的是从页面中接收事件的顺序。
事件发生时会在元素节点之间按照特定的顺序传播,这个传播过程及DOM事件流

比如: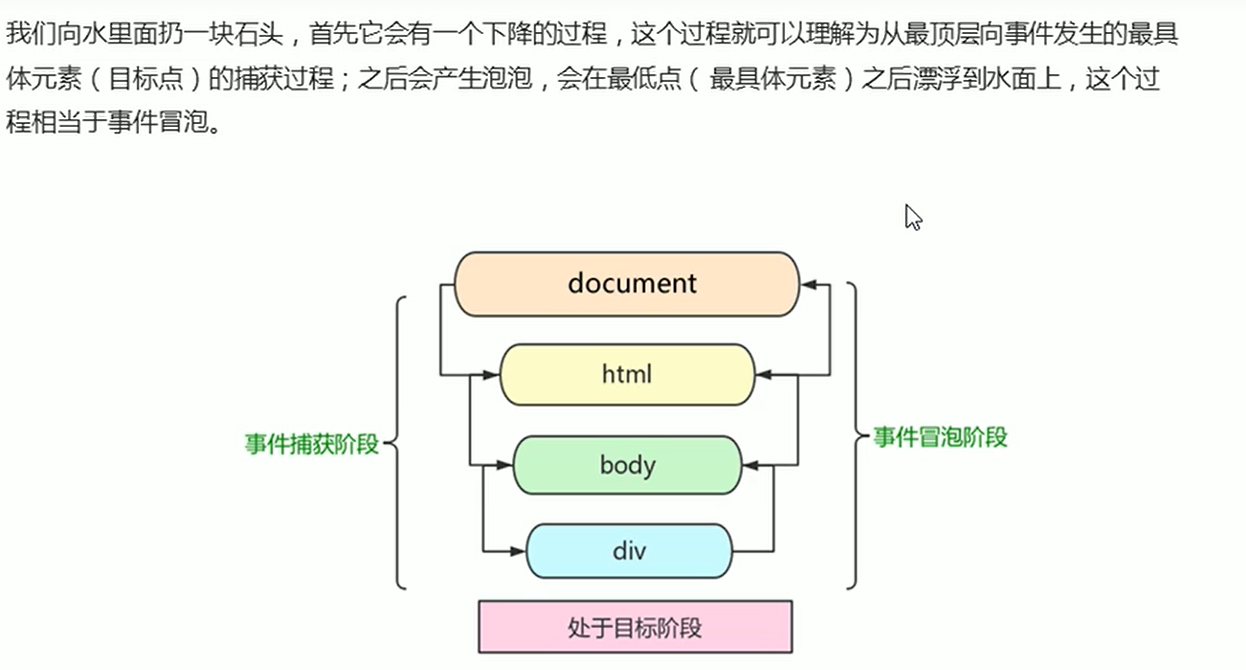
代码:
1 |
|
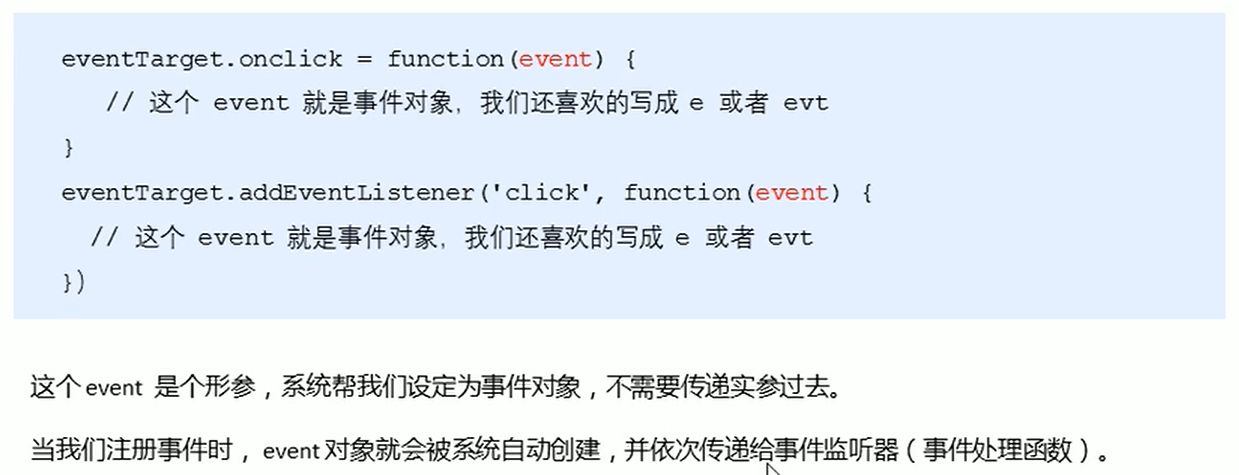
10-事件对象
- 什么是事件对象
- 事件对象的使用方法
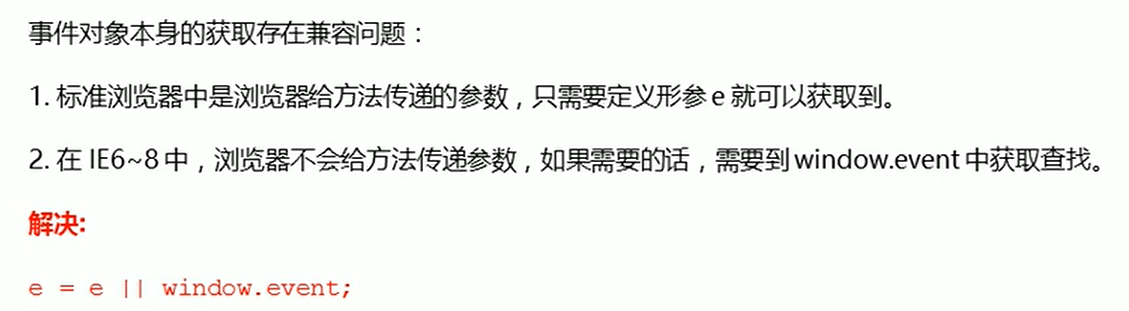
3.事件对象的兼容性方案

代码:1
2
3
4
5
6
7
8
9
10
11
12
13
14
15
16
17
18
19
20
21
22
23
24
25
26
27
28
29
30
31
32
33
34
35
36
37
38
39
40
41
42
43
<html lang="en">
<head>
<meta charset="UTF-8">
<meta name="viewport" content="width=device-width, initial-scale=1.0">
<meta http-equiv="X-UA-Compatible" content="ie=edge">
<title>Document</title>
<style>
div {
width: 100px;
height: 100px;
background-color: pink;
}
</style>
</head>
<body>
<div>123</div>
<script>
// 事件对象
var div = document.querySelector('div');
div.onclick = function(e) {
// console.log(e);
// console.log(window.event);
// e = e || window.event;
console.log(e);
}
// div.addEventListener('click', function(e) {
// console.log(e);
// })
// 1. event 就是一个事件对象 写到我们侦听函数的 小括号里面 当形参来看
// 2. 事件对象只有有了事件才会存在,它是系统给我们自动创建的,不需要我们传递参数
// 3. 事件对象 是 我们事件的一系列相关数据的集合 跟事件相关的 比如鼠标点击里面就包含了鼠标的相关信息,鼠标坐标啊,如果是键盘事件里面就包含的键盘事件的信息 比如 判断用户按下了那个键
// 4. 这个事件对象我们可以自己命名 比如 event 、 evt、 e
// 5. 事件对象也有兼容性问题 ie678 通过 window.event 兼容性的写法 e = e || window.event;
</script>
</body>
</html>
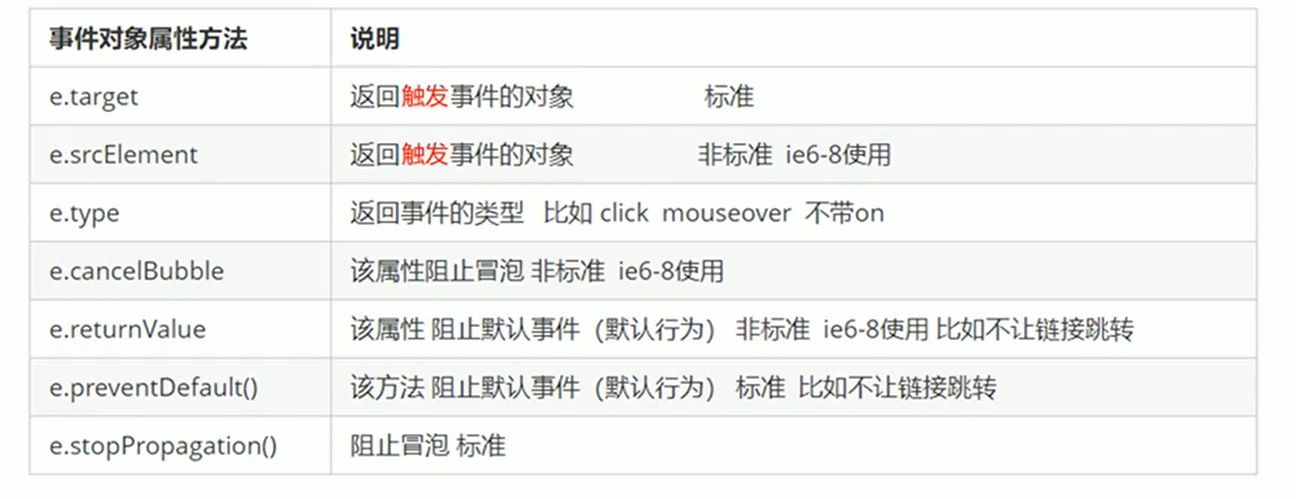
11-事件对象e.target
- 事件对象的常见属性方法
代码:1
2
3
4
5
6
7
8
9
10
11
12
13
14
15
16
17
18
19
20
21
22
23
24
25
26
27
28
29
30
31
32
33
34
35
36
37
38
39
40
41
42
43
44
45
46
47
48
49
50
51
52
53
54
55
56
<html lang="en">
<head>
<meta charset="UTF-8">
<meta name="viewport" content="width=device-width, initial-scale=1.0">
<meta http-equiv="X-UA-Compatible" content="ie=edge">
<title>Document</title>
<style>
div {
width: 100px;
height: 100px;
background-color: pink;
}
</style>
</head>
<body>
<div>123</div>
<ul>
<li>abc</li>
<li>abc</li>
<li>abc</li>
</ul>
<script>
// 常见事件对象的属性和方法
// 1. e.target 返回的是触发事件的对象(元素) this 返回的是绑定事件的对象(元素)
// 区别 : e.target 点击了那个元素,就返回那个元素 this 那个元素绑定了这个点击事件,那么就返回谁
var div = document.querySelector('div');
div.addEventListener('click', function(e) {
console.log(e.target);
console.log(this);
})
var ul = document.querySelector('ul');
ul.addEventListener('click', function(e) {
// 我们给ul 绑定了事件 那么this 就指向ul
console.log(this);
console.log(e.currentTarget);
// e.target 指向我们点击的那个对象 谁触发了这个事件 我们点击的是li e.target 指向的就是li
console.log(e.target);
})
// 了解兼容性
// div.onclick = function(e) {
// e = e || window.event;
// var target = e.target || e.srcElement;
// console.log(target);
// }
// 2. 了解 跟 this 有个非常相似的属性 currentTarget ie678不认识
</script>
</body>
</html>
12-事件对象阻止默认行为
代码:1
2
3
4
5
6
7
8
9
10
11
12
13
14
15
16
17
18
19
20
21
22
23
24
25
26
27
28
29
30
31
32
33
34
35
36
37
38
39
40
41
42
43
44
45
46
47
48
49
50
<html lang="en">
<head>
<meta charset="UTF-8">
<meta name="viewport" content="width=device-width, initial-scale=1.0">
<meta http-equiv="X-UA-Compatible" content="ie=edge">
<title>Document</title>
<style>
</style>
</head>
<body>
<div>123</div>
<a href="http://www.baidu.com">百度</a>
<form action="http://www.baidu.com">
<input type="submit" value="提交" name="sub">
</form>
<script>
// 常见事件对象的属性和方法
// 1. 返回事件类型
var div = document.querySelector('div');
div.addEventListener('click', fn);
div.addEventListener('mouseover', fn);
div.addEventListener('mouseout', fn);
function fn(e) {
console.log(e.type);
}
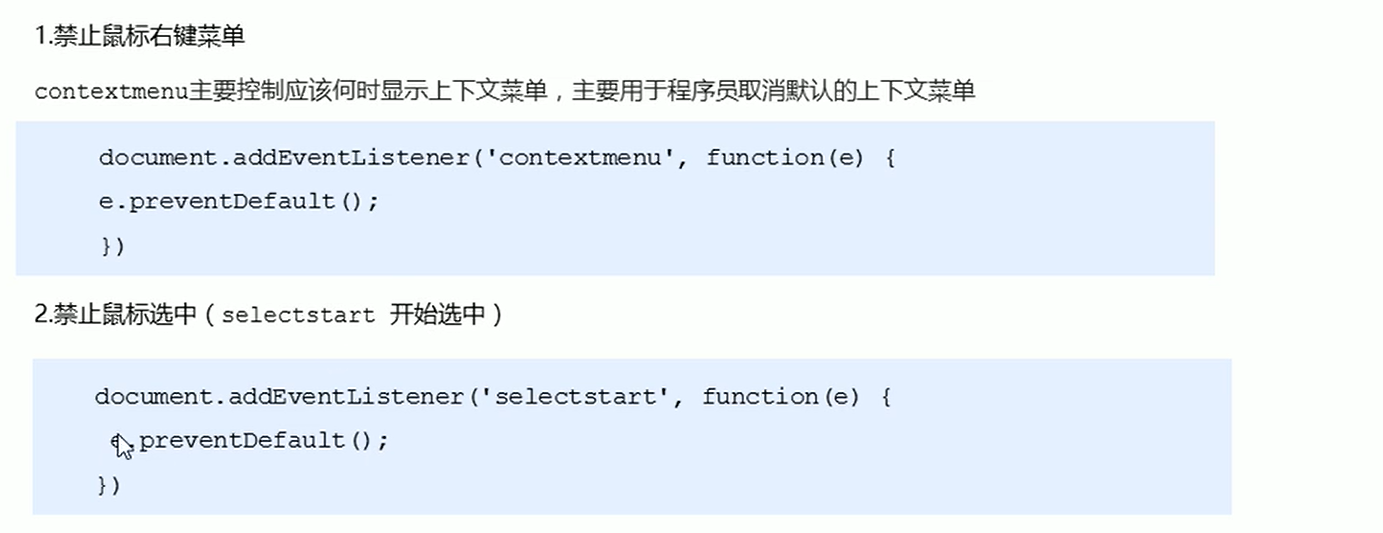
// 2. 阻止默认行为(事件) 让链接不跳转 或者让提交按钮不提交
var a = document.querySelector('a');
a.addEventListener('click', function(e) {
e.preventDefault(); // dom 标准写法
})
// 3. 传统的注册方式
a.onclick = function(e) {
// 普通浏览器 e.preventDefault(); 方法
// e.preventDefault();
// 低版本浏览器 ie678 returnValue 属性
// e.returnValue;
// 我们可以利用return false 也能阻止默认行为 没有兼容性问题 特点: return 后面的代码不执行了, 而且只限于传统的注册方式
return false;
alert(11);
}
</script>
</body>
</html>
13-阻止事件冒泡(重点)
- 阻止事件冒泡的两种方式
事件冒泡:开始时由最具体的元素接收,然后逐渐向上传播到DOM最顶层节点.
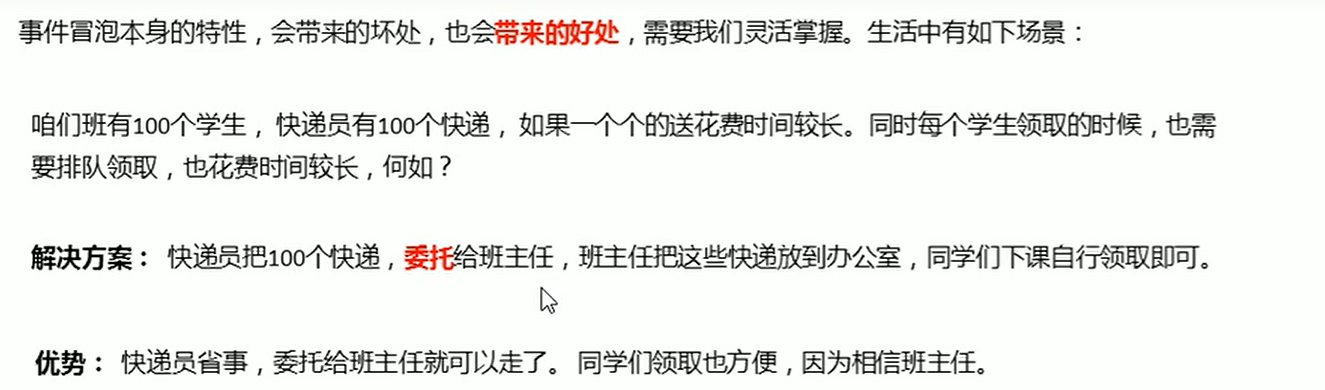
事件冒泡本身的特性,会带来坏处,也会带来好处,需要我们灵活掌握.
阻止事件冒泡
- 标准写法: 利用事件对象里面的
stopPropagation()方法1
e.stopPropagation();
- 非标准写法: IE6-8 利用事件对象的
cancelBubble属性1
e.cancelBubble = true;
- 事件兼容性问题以及解决方案

代码:1
2
3
4
5
6
7
8
9
10
11
12
13
14
15
16
17
18
19
20
21
22
23
24
25
26
27
28
29
30
31
32
33
34
35
36
37
38
39
40
41
42
43
44
45
46
47
48
49
50
51
52
53
54
<html lang="en">
<head>
<meta charset="UTF-8">
<meta name="viewport" content="width=device-width, initial-scale=1.0">
<meta http-equiv="X-UA-Compatible" content="ie=edge">
<title>Document</title>
<style>
.father {
overflow: hidden;
width: 300px;
height: 300px;
margin: 100px auto;
background-color: pink;
text-align: center;
}
.son {
width: 200px;
height: 200px;
margin: 50px;
background-color: purple;
line-height: 200px;
color: #fff;
}
</style>
</head>
<body>
<div class="father">
<div class="son">son儿子</div>
</div>
<script>
// 常见事件对象的属性和方法
// 阻止冒泡 dom 推荐的标准 stopPropagation()
var son = document.querySelector('.son');
son.addEventListener('click', function(e) {
alert('son');
e.stopPropagation(); // stop 停止 Propagation 传播
e.cancelBubble = true; // 非标准 cancel 取消 bubble 泡泡
}, false);
var father = document.querySelector('.father');
father.addEventListener('click', function() {
alert('father');
}, false);
document.addEventListener('click', function() {
alert('document');
})
</script>
</body>
</html>
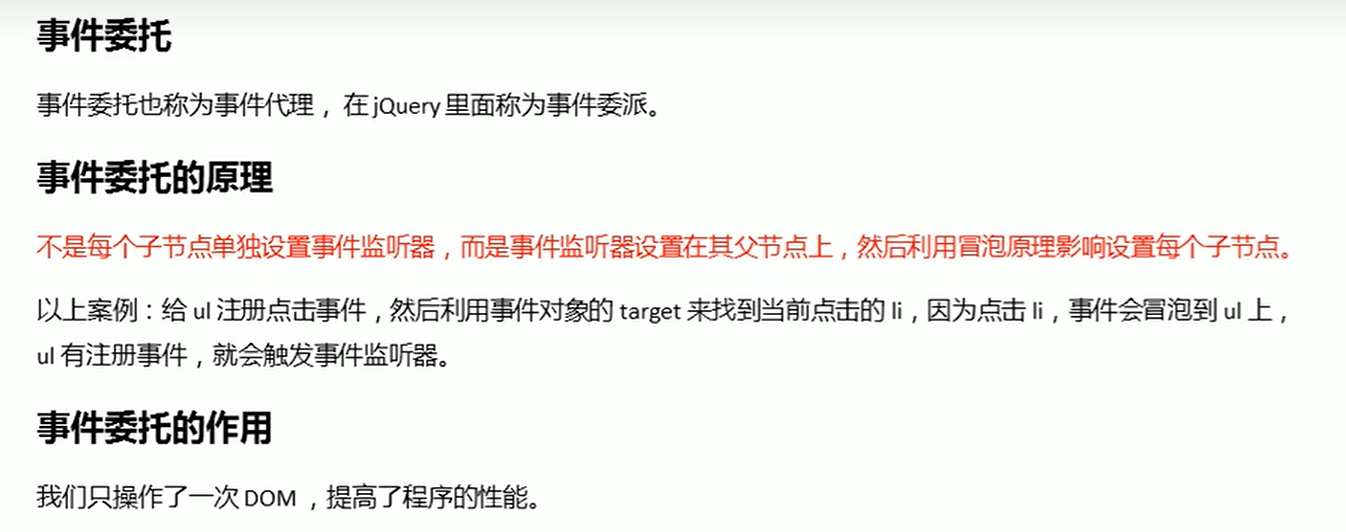
14-事件委托
代码:1
2
3
4
5
6
7
8
9
10
11
12
13
14
15
16
17
18
19
20
21
22
23
24
25
26
27
28
29
30
31
32
<html lang="en">
<head>
<meta charset="UTF-8">
<meta name="viewport" content="width=device-width, initial-scale=1.0">
<meta http-equiv="X-UA-Compatible" content="ie=edge">
<title>Document</title>
</head>
<body>
<ul>
<li>知否知否,点我应有弹框在手!</li>
<li>知否知否,点我应有弹框在手!</li>
<li>知否知否,点我应有弹框在手!</li>
<li>知否知否,点我应有弹框在手!</li>
<li>知否知否,点我应有弹框在手!</li>
</ul>
<script>
// 事件委托的核心原理:给父节点添加侦听器, 利用事件冒泡影响每一个子节点
var ul = document.querySelector('ul');
ul.addEventListener('click', function(e) {
// alert('知否知否,点我应有弹框在手!');
// e.target 这个可以得到我们点击的对象
e.target.style.backgroundColor = 'pink';
})
</script>
</body>
</html>
15-常见鼠标事件
常用的鼠标事件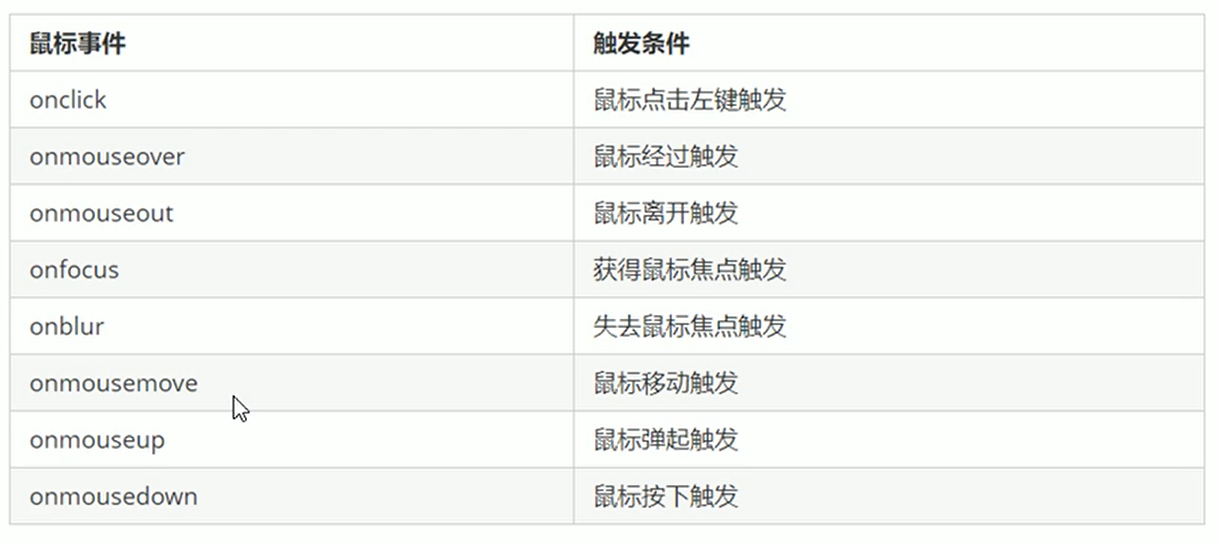
1 |
|
16-鼠标事件对象
代码:1
2
3
4
5
6
7
8
9
10
11
12
13
14
15
16
17
18
19
20
21
22
23
24
25
26
27
28
29
30
31
32
33
34
35
36
37
38
<html lang="en">
<head>
<meta charset="UTF-8">
<meta name="viewport" content="width=device-width, initial-scale=1.0">
<meta http-equiv="X-UA-Compatible" content="ie=edge">
<title>Document</title>
<style>
body {
height: 3000px;
}
</style>
</head>
<body>
<script>
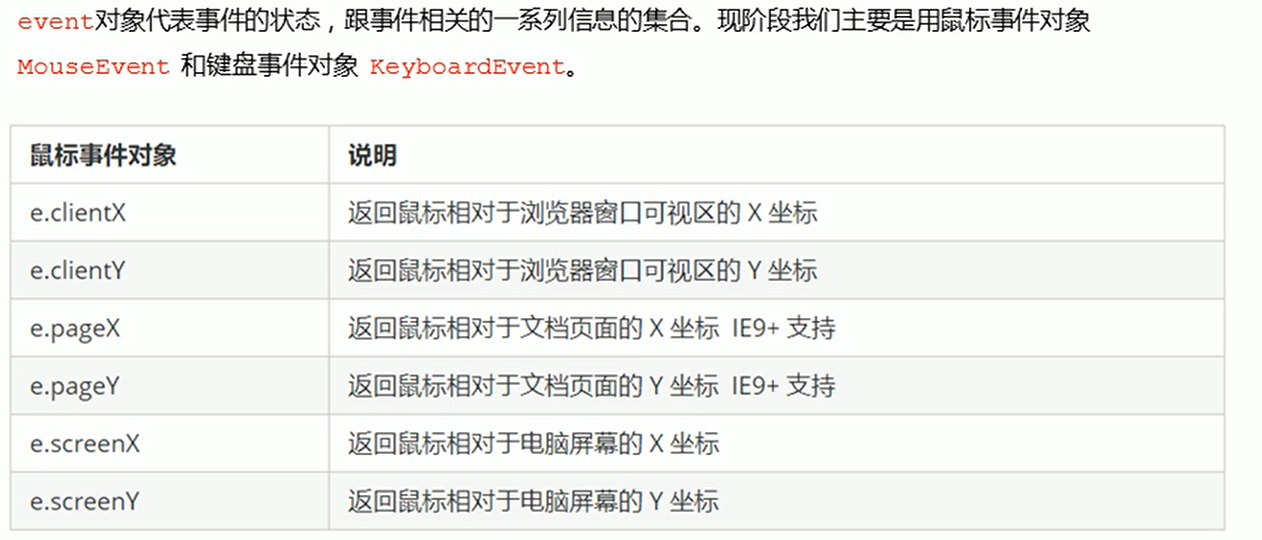
// 鼠标事件对象 MouseEvent
document.addEventListener('click', function(e) {
// 1. client 鼠标在可视区的x和y坐标
console.log(e.clientX);
console.log(e.clientY);
console.log('---------------------');
// 2. page 鼠标在页面文档的x和y坐标
console.log(e.pageX);
console.log(e.pageY);
console.log('---------------------');
// 3. screen 鼠标在电脑屏幕的x和y坐标
console.log(e.screenX);
console.log(e.screenY);
})
</script>
</body>
</html>
16-跟随鼠标的天使
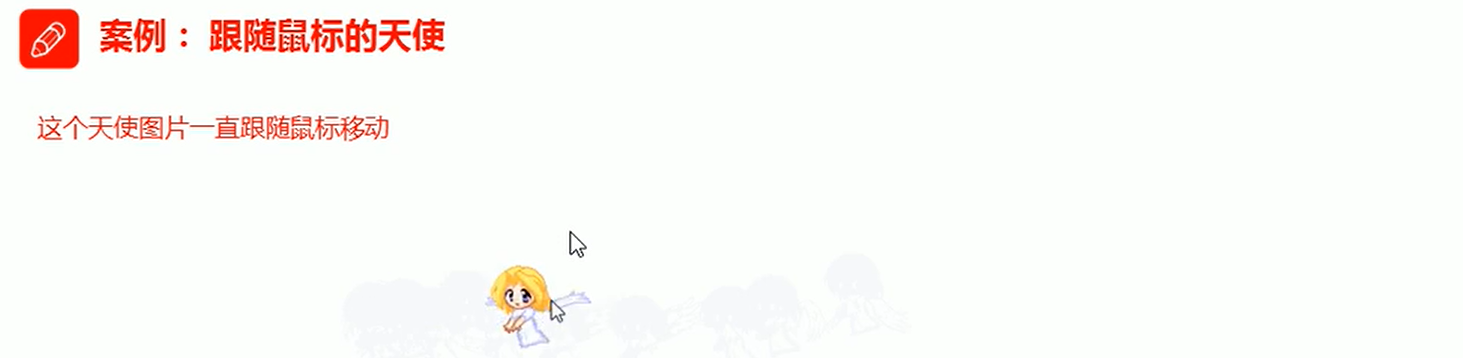
案例分析
代码:1
2
3
4
5
6
7
8
9
10
11
12
13
14
15
16
17
18
19
20
21
22
23
24
25
26
27
28
29
30
31
32
33
34
35
36
37
<html lang="en">
<head>
<meta charset="UTF-8">
<meta name="viewport" content="width=device-width, initial-scale=1.0">
<meta http-equiv="X-UA-Compatible" content="ie=edge">
<title>Document</title>
<style>
img {
position: absolute;
top: 2px;
}
</style>
</head>
<body>
<img src="images/angel.gif" alt="">
<script>
var pic = document.querySelector('img');
document.addEventListener('mousemove', function(e) {
// 1. mousemove只要我们鼠标移动1px 就会触发这个事件
// console.log(1);
// 2.核心原理: 每次鼠标移动,我们都会获得最新的鼠标坐标, 把这个x和y坐标做为图片的top和left 值就可以移动图片
var x = e.pageX;
var y = e.pageY;
console.log('x坐标是' + x, 'y坐标是' + y);
//3 . 千万不要忘记给left 和top 添加px 单位
pic.style.left = x - 50 + 'px';
pic.style.top = y - 40 + 'px';
});
</script>
</body>
</html>
第四天学习
01-常用的键盘事件
- 常用键盘事件
代码:1
2
3
4
5
6
7
8
9
10
11
12
13
14
15
16
17
18
19
20
21
22
23
24
25
26
27
28
29
30
31
32
33
34
35
36
<html lang="en">
<head>
<meta charset="UTF-8">
<meta name="viewport" content="width=device-width, initial-scale=1.0">
<meta http-equiv="X-UA-Compatible" content="ie=edge">
<title>Document</title>
</head>
<body>
<script>
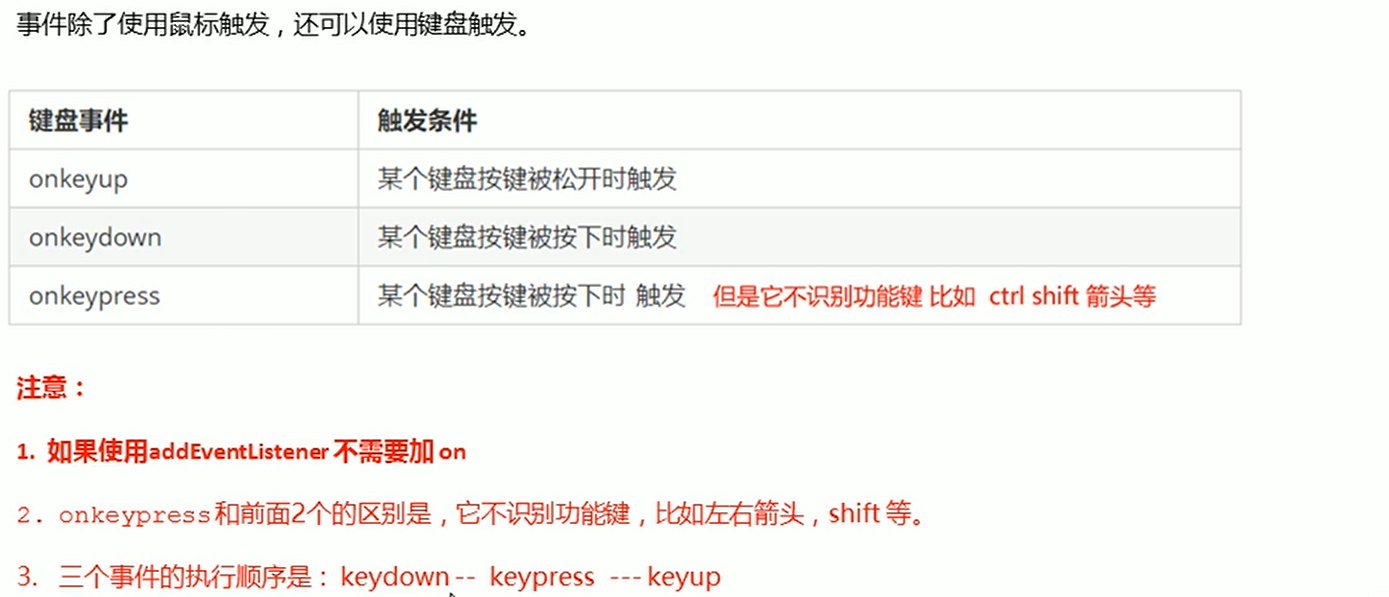
// 常用的键盘事件
//1. keyup 按键弹起的时候触发
// document.onkeyup = function() {
// console.log('我弹起了');
// }
document.addEventListener('keyup', function() {
console.log('我弹起了');
})
//3. keypress 按键按下的时候触发 不能识别功能键 比如 ctrl shift 左右箭头啊
document.addEventListener('keypress', function() {
console.log('我按下了press');
})
//2. keydown 按键按下的时候触发 能识别功能键 比如 ctrl shift 左右箭头啊
document.addEventListener('keydown', function() {
console.log('我按下了down');
})
// 4. 三个事件的执行顺序 keydown -- keypress -- keyup
</script>
</body>
</html>
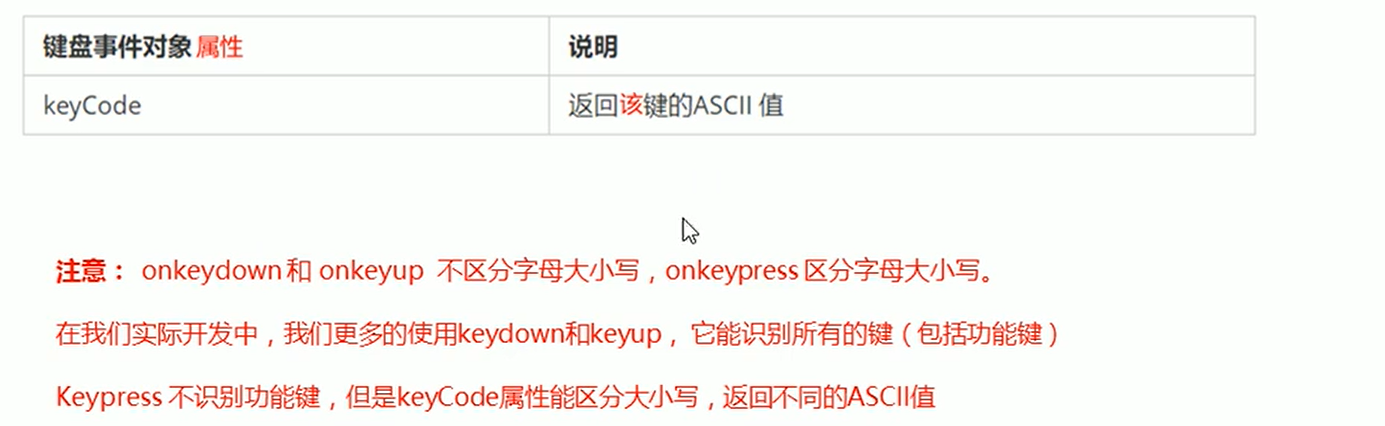
02-键盘事件对象之keyCode属性
代码:1
2
3
4
5
6
7
8
9
10
11
12
13
14
15
16
17
18
19
20
21
22
23
24
25
26
27
28
29
30
31
32
33
34
35
<html lang="en">
<head>
<meta charset="UTF-8">
<meta name="viewport" content="width=device-width, initial-scale=1.0">
<meta http-equiv="X-UA-Compatible" content="ie=edge">
<title>Document</title>
</head>
<body>
<script>
// 键盘事件对象中的keyCode属性可以得到相应键的ASCII码值
// 1. 我们的keyup 和keydown事件不区分字母大小写 a 和 A 得到的都是65
// 2. 我们的keypress 事件 区分字母大小写 a 97 和 A 得到的是65
document.addEventListener('keyup', function(e) {
// console.log(e);
console.log('up:' + e.keyCode);
// 我们可以利用keycode返回的ASCII码值来判断用户按下了那个键
if (e.keyCode === 65) {
alert('您按下的a键');
} else {
alert('您没有按下a键')
}
})
document.addEventListener('keypress', function(e) {
// console.log(e);
console.log('press:' + e.keyCode);
})
</script>
</body>
</html>
03-模拟京东案件输入内容案例

案件分析
代码:1
2
3
4
5
6
7
8
9
10
11
12
13
14
15
16
17
18
19
20
21
22
23
24
25
26
27
<html lang="en">
<head>
<meta charset="UTF-8">
<meta name="viewport" content="width=device-width, initial-scale=1.0">
<meta http-equiv="X-UA-Compatible" content="ie=edge">
<title>Document</title>
</head>
<body>
<input type="text">
<script>
// 核心思路: 检测用户是否按下了s 键,如果按下s 键,就把光标定位到搜索框里面
// 使用键盘事件对象里面的keyCode 判断用户按下的是否是s键
// 搜索框获得焦点: 使用 js 里面的 focus() 方法
var search = document.querySelector('input');
document.addEventListener('keyup', function(e) {
// console.log(e.keyCode);
if (e.keyCode === 83) {
search.focus();
}
})
</script>
</body>
</html>
04-模拟京东快递单号查询案例
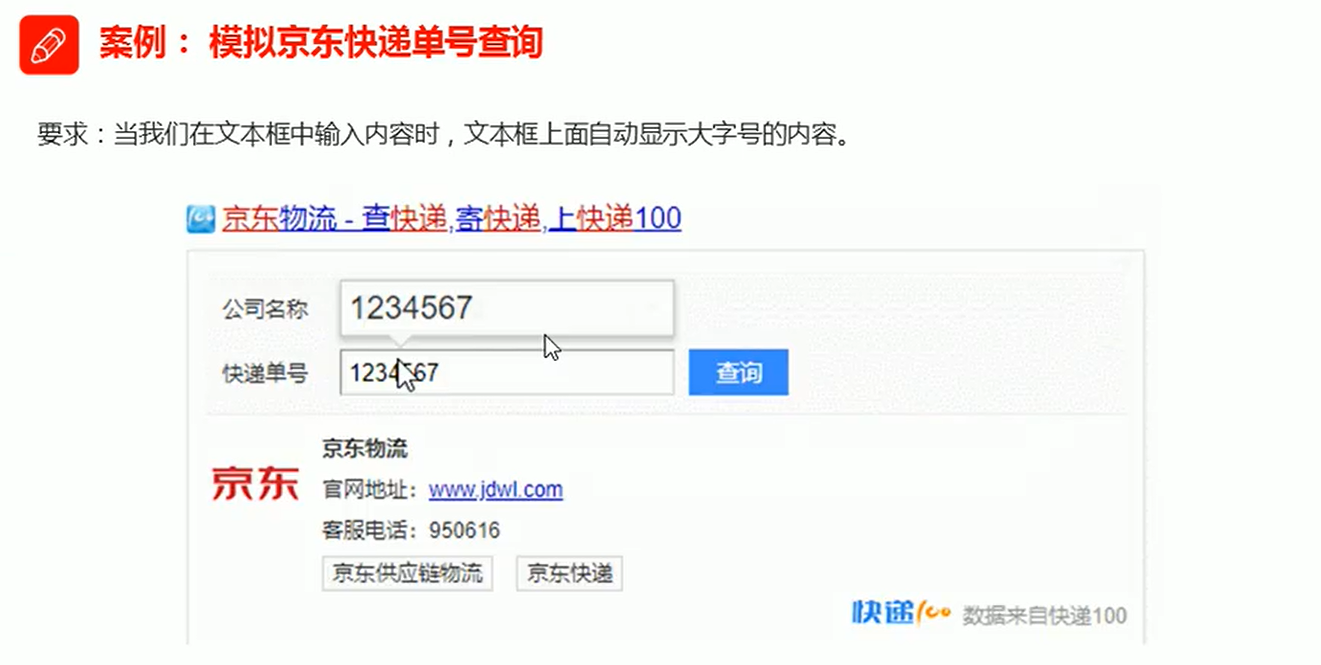
案件分析
注意: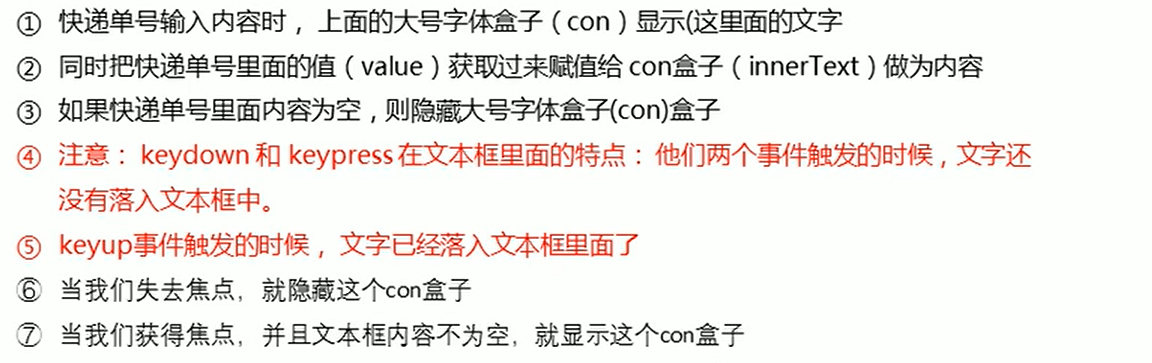
代码:1
2
3
4
5
6
7
8
9
10
11
12
13
14
15
16
17
18
19
20
21
22
23
24
25
26
27
28
29
30
31
32
33
34
35
36
37
38
39
40
41
42
43
44
45
46
47
48
49
50
51
52
53
54
55
56
57
58
59
60
61
62
63
64
65
66
67
68
69
70
71
72
73
74
75
76
77
78
79
80
<html lang="en">
<head>
<meta charset="UTF-8">
<meta name="viewport" content="width=device-width, initial-scale=1.0">
<meta http-equiv="X-UA-Compatible" content="ie=edge">
<title>Document</title>
<style>
* {
margin: 0;
padding: 0;
}
.search {
position: relative;
width: 178px;
margin: 100px;
}
.con {
display: none;
position: absolute;
top: -40px;
width: 171px;
border: 1px solid rgba(0, 0, 0, .2);
box-shadow: 0 2px 4px rgba(0, 0, 0, .2);
padding: 5px 0;
font-size: 18px;
line-height: 20px;
color: #333;
}
.con::before {
content: '';
width: 0;
height: 0;
position: absolute;
top: 28px;
left: 18px;
border: 8px solid #000;
border-style: solid dashed dashed;
border-color: #fff transparent transparent;
}
</style>
</head>
<body>
<div class="search">
<div class="con">123</div>
<input type="text" placeholder="请输入您的快递单号" class="jd">
</div>
<script>
// 快递单号输入内容时, 上面的大号字体盒子(con)显示(这里面的字号更大)
// 表单检测用户输入: 给表单添加键盘事件
// 同时把快递单号里面的值(value)获取过来赋值给 con盒子(innerText)做为内容
// 如果快递单号里面内容为空,则隐藏大号字体盒子(con)盒子
var con = document.querySelector('.con');
var jd_input = document.querySelector('.jd');
jd_input.addEventListener('keyup', function() {
// console.log('输入内容啦');
if (this.value == '') {
con.style.display = 'none';
} else {
con.style.display = 'block';
con.innerText = this.value;
}
})
// 当我们失去焦点,就隐藏这个con盒子
jd_input.addEventListener('blur', function() {
con.style.display = 'none';
})
// 当我们获得焦点,就显示这个con盒子
jd_input.addEventListener('focus', function() {
if (this.value !== '') {
con.style.display = 'block';
}
})
</script>
</body>
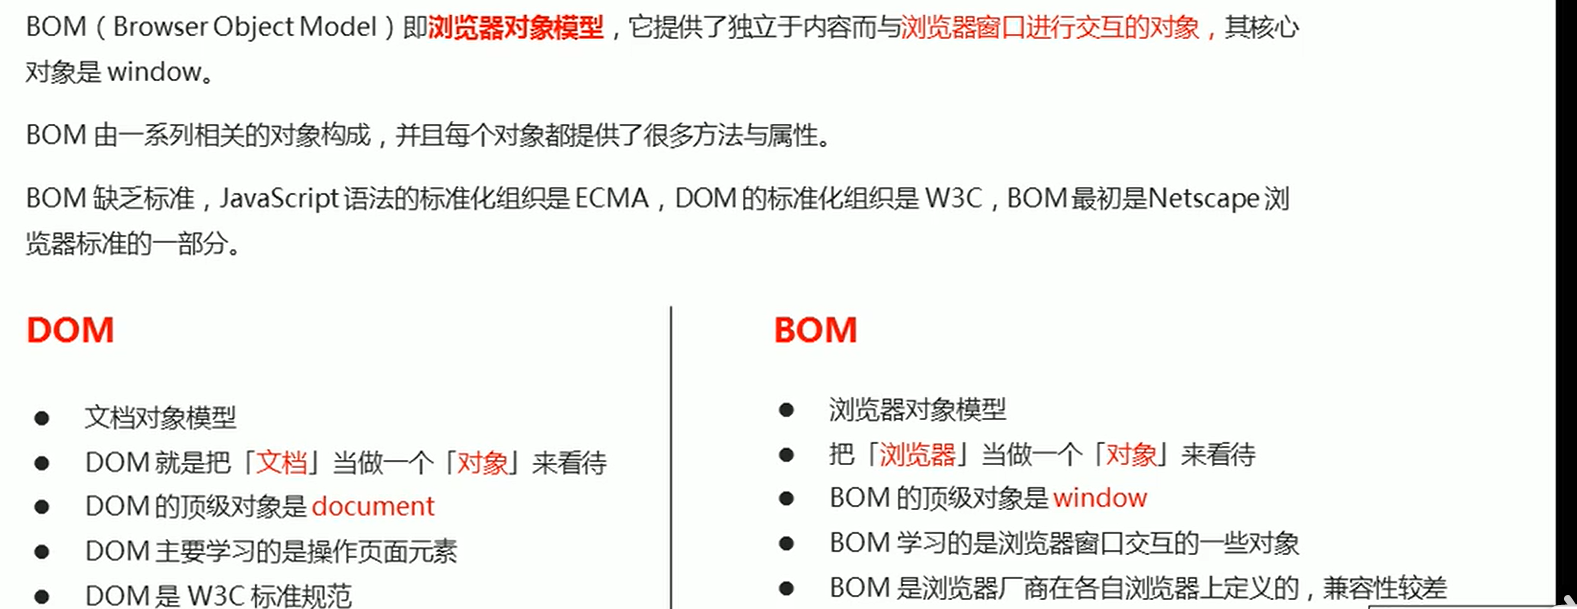
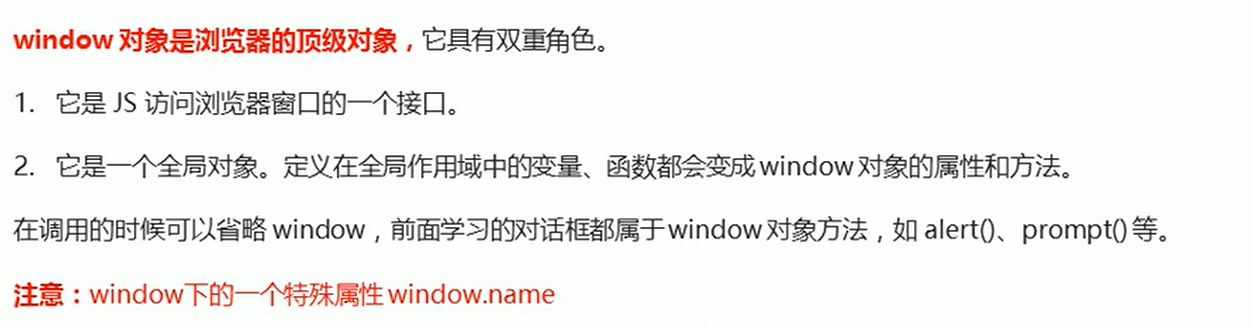
05-BOM顶级对象window
- 什么是BOM?
- BOM的构成
BOM比DOM更大,它包含DOM.

代码:1
2
3
4
5
6
7
8
9
10
11
12
13
14
15
16
17
18
19
20
21
22
23
24
25
26
27
28
29
30
31
32
<html lang="en">
<head>
<meta charset="UTF-8">
<meta name="viewport" content="width=device-width, initial-scale=1.0">
<meta http-equiv="X-UA-Compatible" content="ie=edge">
<title>Document</title>
</head>
<body>
<script>
// window.document.querySelector()
var num = 10;
console.log(num);
console.log(window.num);
function fn() {
console.log(11);
}
fn();
window.fn();
// alert(11);
// window.alert(11)
console.dir(window);
// var name = 10;
console.log(window.name);
</script>
</body>
</html>
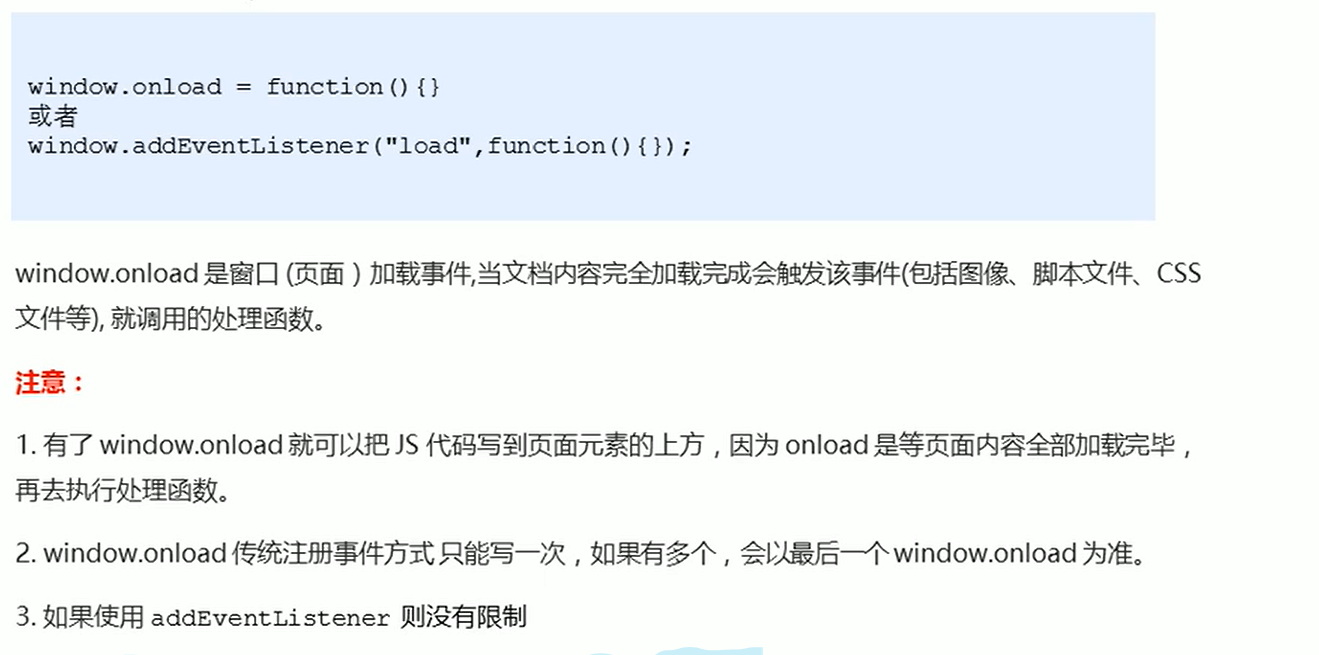
06-Window对象的常见事件
- 窗口加载事件
window常见对象onload
代码:1
2
3
4
5
6
7
8
9
10
11
12
13
14
15
16
17
18
19
20
21
22
23
24
25
26
27
28
29
30
31
32
33
34
35
36
37
38
39
40
41
42
43
<html lang="en">
<head>
<meta charset="UTF-8">
<meta name="viewport" content="width=device-width, initial-scale=1.0">
<meta http-equiv="X-UA-Compatible" content="ie=edge">
<title>Document</title>
<script>
// window.onload = function() {
// var btn = document.querySelector('button');
// btn.addEventListener('click', function() {
// alert('点击我');
// })
// }
// window.onload = function() {
// alert(22);
// }
window.addEventListener('load', function() {
var btn = document.querySelector('button');
btn.addEventListener('click', function() {
alert('点击我');
})
})
window.addEventListener('load', function() {
alert(22);
})
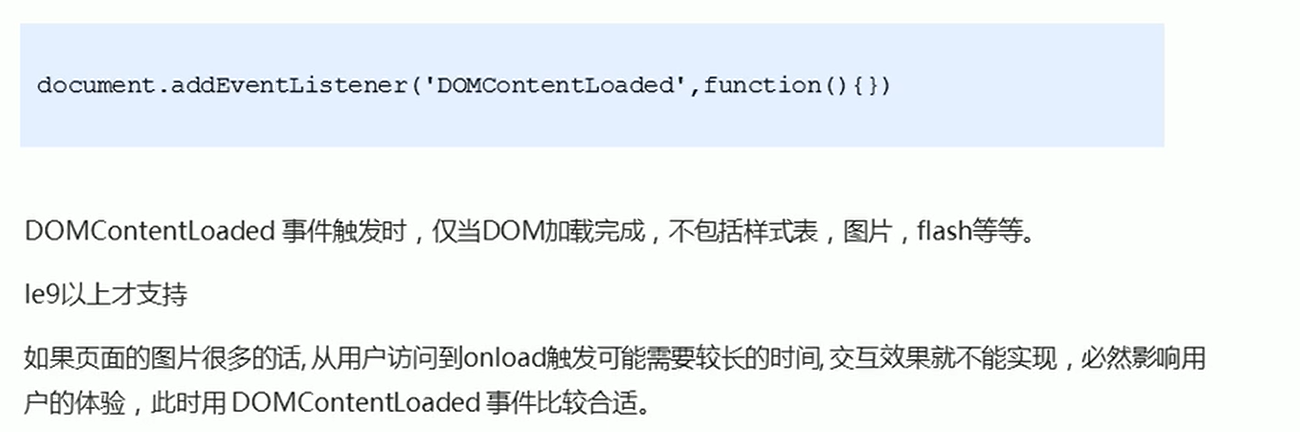
document.addEventListener('DOMContentLoaded', function() {
alert(33);
})
// load 等页面内容全部加载完毕,包含页面dom元素 图片 flash css 等等
// DOMContentLoaded 是DOM 加载完毕,不包含图片 falsh css 等就可以执行 加载速度比 load更快一些
</script>
</head>
<body>
<button>点击</button>
</body>
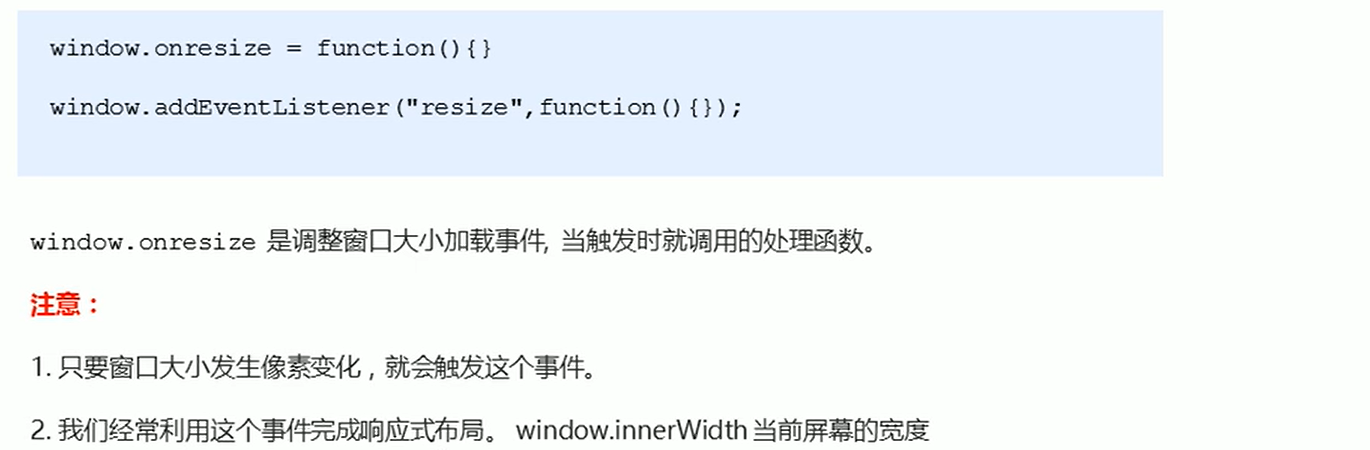
</html>07-调整窗口事大小事件
代码:1
2
3
4
5
6
7
8
9
10
11
12
13
14
15
16
17
18
19
20
21
22
23
24
25
26
27
28
29
30
31
32
33
34
35
36
37
38
<html lang="en">
<head>
<meta charset="UTF-8">
<meta name="viewport" content="width=device-width, initial-scale=1.0">
<meta http-equiv="X-UA-Compatible" content="ie=edge">
<title>Document</title>
<style>
div {
width: 200px;
height: 200px;
background-color: pink;
}
</style>
</head>
<body>
<script>
window.addEventListener('load', function() {
var div = document.querySelector('div');
window.addEventListener('resize', function() {
console.log(window.innerWidth);
console.log('变化了');
if (window.innerWidth <= 800) {
div.style.display = 'none';
} else {
div.style.display = 'block';
}
})
})
</script>
<div></div>
</body>
</html>
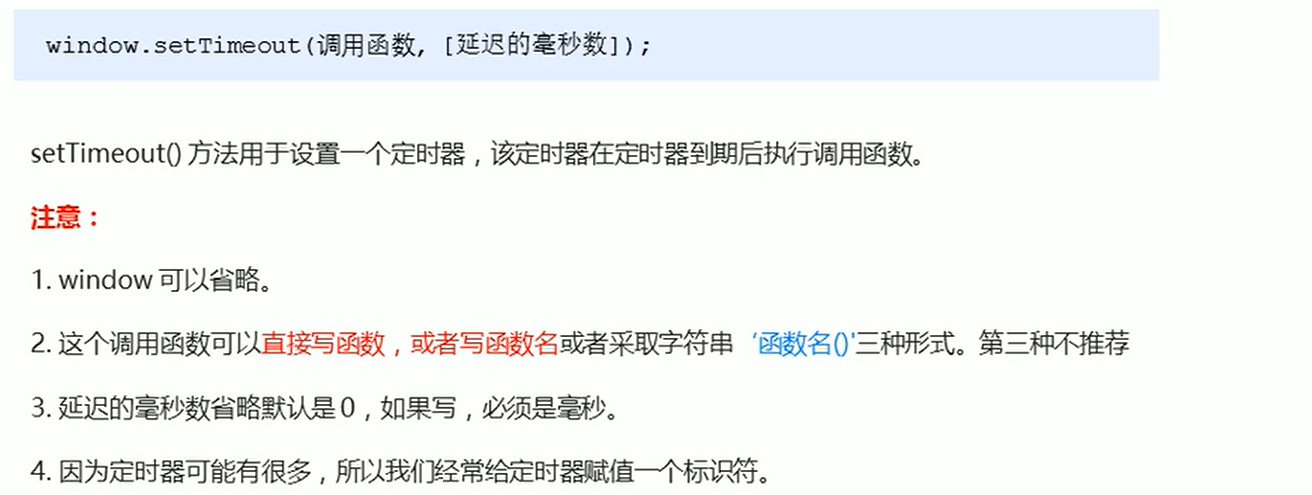
08-定时器
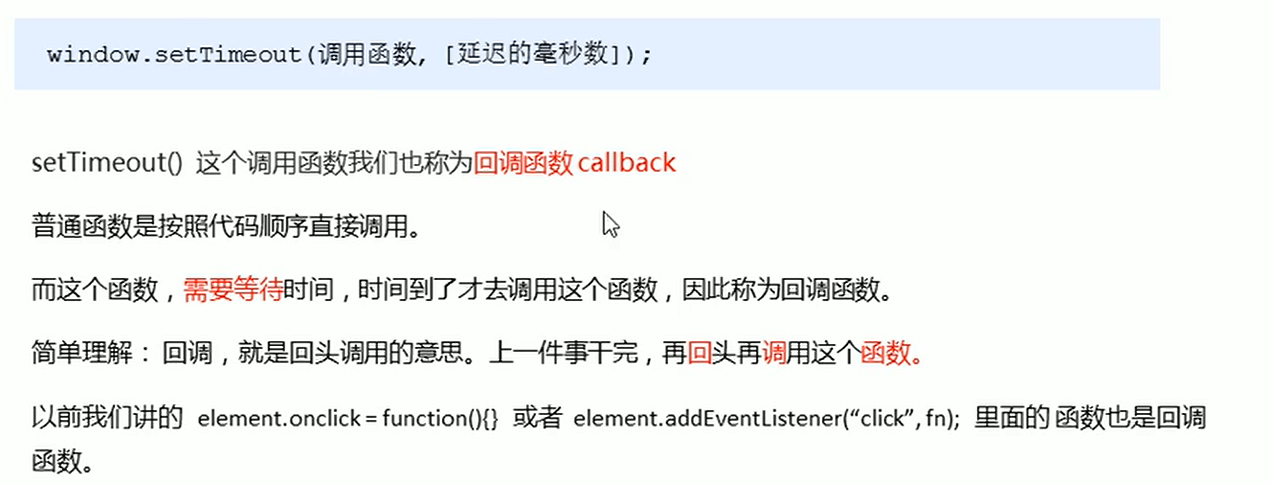
- 定时器之setTimeout
- 回调函数
代码:1
2
3
4
5
6
7
8
9
10
11
12
13
14
15
16
17
18
19
20
21
22
23
24
25
26
27
28
29
30
31
32
33
<html lang="en">
<head>
<meta charset="UTF-8">
<meta name="viewport" content="width=device-width, initial-scale=1.0">
<meta http-equiv="X-UA-Compatible" content="ie=edge">
<title>Document</title>
</head>
<body>
<script>
// 1. setTimeout
// 语法规范: window.setTimeout(调用函数, 延时时间);
// 1. 这个window在调用的时候可以省略
// 2. 这个延时时间单位是毫秒 但是可以省略,如果省略默认的是0
// 3. 这个调用函数可以直接写函数 还可以写 函数名 还有一个写法 '函数名()'
// 4. 页面中可能有很多的定时器,我们经常给定时器加标识符 (名字)
// setTimeout(function() {
// console.log('时间到了');
// }, 2000);
function callback() {
console.log('爆炸了');
}
var timer1 = setTimeout(callback, 3000);
var timer2 = setTimeout(callback, 5000);
// setTimeout('callback()', 3000); // 我们不提倡这个写法
</script>
</body>
</html>09-5秒之后自动关闭的广告案例
案件分析- 核心思路:5秒钟之后,就把这个广告隐藏起来
- 用定时器setTimeout
代码:1
2
3
4
5
6
7
8
9
10
11
12
13
14
15
16
17
18
19
20
21
<html lang="en">
<head>
<meta charset="UTF-8">
<meta name="viewport" content="width=device-width, initial-scale=1.0">
<meta http-equiv="X-UA-Compatible" content="ie=edge">
<title>Document</title>
</head>
<body>
<img src="images/ad.jpg" alt="" class="ad">
<script>
var ad = document.querySelector('.ad');
setTimeout(function() {
ad.style.display = 'none';
}, 5000);
</script>
</body>
</html>
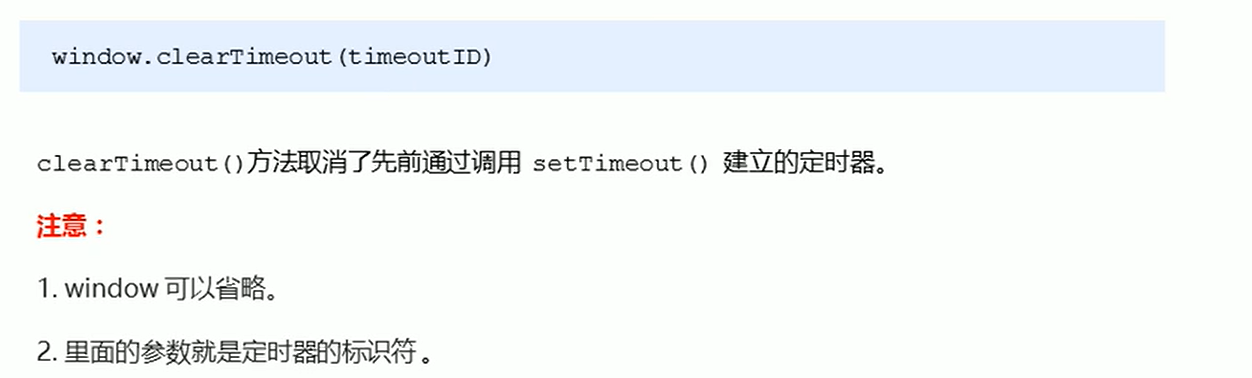
10-清除(停止)setTimeout定时器
代码:1
2
3
4
5
6
7
8
9
10
11
12
13
14
15
16
17
18
19
20
21
22
23
24
25
<html lang="en">
<head>
<meta charset="UTF-8">
<meta name="viewport" content="width=device-width, initial-scale=1.0">
<meta http-equiv="X-UA-Compatible" content="ie=edge">
<title>Document</title>
</head>
<body>
<button>点击停止定时器</button>
<script>
var btn = document.querySelector('button');
var timer = setTimeout(function() {
console.log('爆炸了');
}, 5000);
btn.addEventListener('click', function() {
clearTimeout(timer);
})
</script>
</body>
</html>
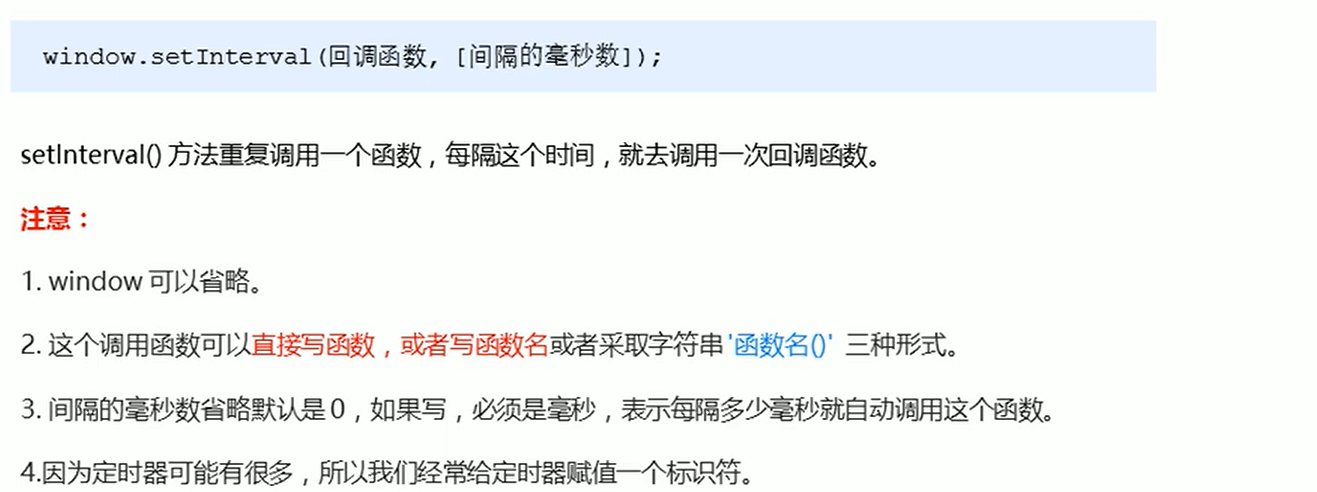
11-定时器之setInterval
代码:1
2
3
4
5
6
7
8
9
10
11
12
13
14
15
16
17
18
19
20
21
22
23
24
<html lang="en">
<head>
<meta charset="UTF-8">
<meta name="viewport" content="width=device-width, initial-scale=1.0">
<meta http-equiv="X-UA-Compatible" content="ie=edge">
<title>Document</title>
</head>
<body>
<script>
// 1. setInterval
// 语法规范: window.setInterval(调用函数, 延时时间);
setInterval(function() {
console.log('继续输出');
}, 1000);
// 2. setTimeout 延时时间到了,就去调用这个回调函数,只调用一次 就结束了这个定时器
// 3. setInterval 每隔这个延时时间,就去调用这个回调函数,会调用很多次,重复调用这个函数
</script>
</body>
</html>
12-倒计时效果案例
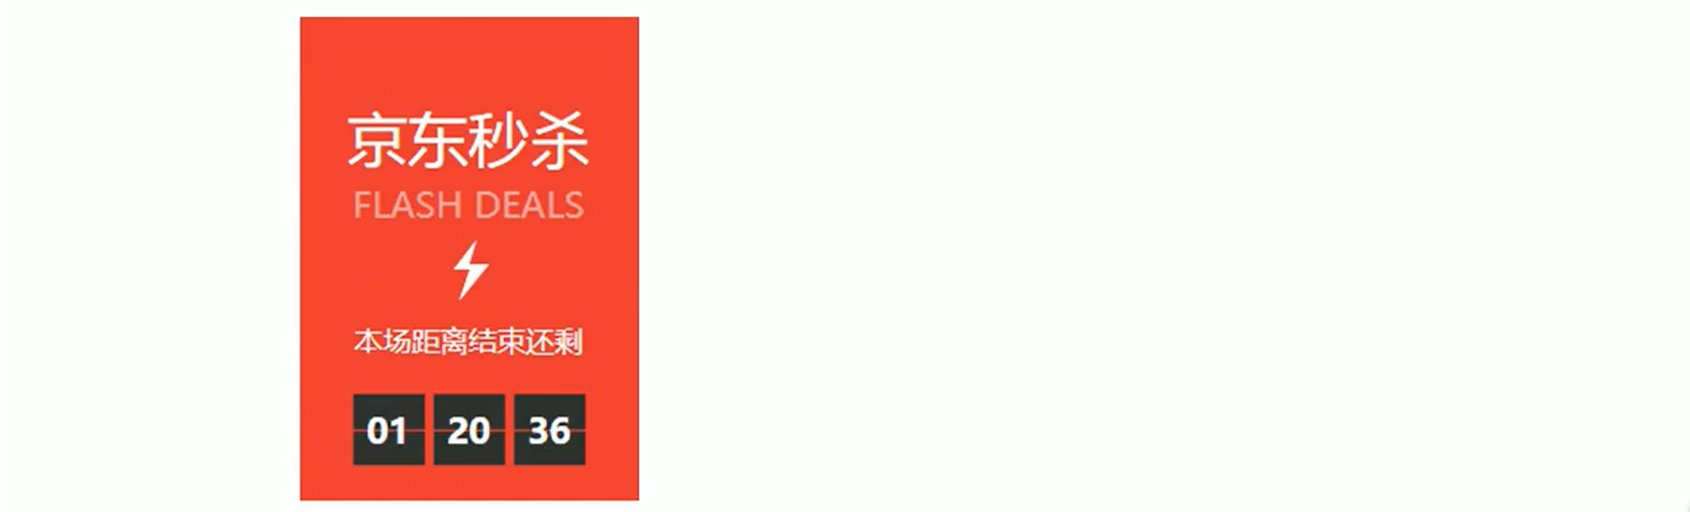
案例分析
代码:1
2
3
4
5
6
7
8
9
10
11
12
13
14
15
16
17
18
19
20
21
22
23
24
25
26
27
28
29
30
31
32
33
34
35
36
37
38
39
40
41
42
43
44
45
46
47
48
49
50
51
52
53
54
55
56
57
58
59
<html lang="en">
<head>
<meta charset="UTF-8">
<meta name="viewport" content="width=device-width, initial-scale=1.0">
<meta http-equiv="X-UA-Compatible" content="ie=edge">
<title>Document</title>
<style>
div {
margin: 200px;
}
span {
display: inline-block;
width: 40px;
height: 40px;
background-color: #333;
font-size: 20px;
color: #fff;
text-align: center;
line-height: 40px;
}
</style>
</head>
<body>
<div>
<span class="hour">1</span>
<span class="minute">2</span>
<span class="second">3</span>
</div>
<script>
// 1. 获取元素
var hour = document.querySelector('.hour'); // 小时的黑色盒子
var minute = document.querySelector('.minute'); // 分钟的黑色盒子
var second = document.querySelector('.second'); // 秒数的黑色盒子
var inputTime = +new Date('2019-5-1 18:00:00'); // 返回的是用户输入时间总的毫秒数
countDown(); // 我们先调用一次这个函数,防止第一次刷新页面有空白
// 2. 开启定时器
setInterval(countDown, 1000);
function countDown() {
var nowTime = +new Date(); // 返回的是当前时间总的毫秒数
var times = (inputTime - nowTime) / 1000; // times是剩余时间总的秒数
var h = parseInt(times / 60 / 60 % 24); //时
h = h < 10 ? '0' + h : h;
hour.innerHTML = h; // 把剩余的小时给 小时黑色盒子
var m = parseInt(times / 60 % 60); // 分
m = m < 10 ? '0' + m : m;
minute.innerHTML = m;
var s = parseInt(times % 60); // 当前的秒
s = s < 10 ? '0' + s : s;
second.innerHTML = s;
}
</script>
</body>
</html
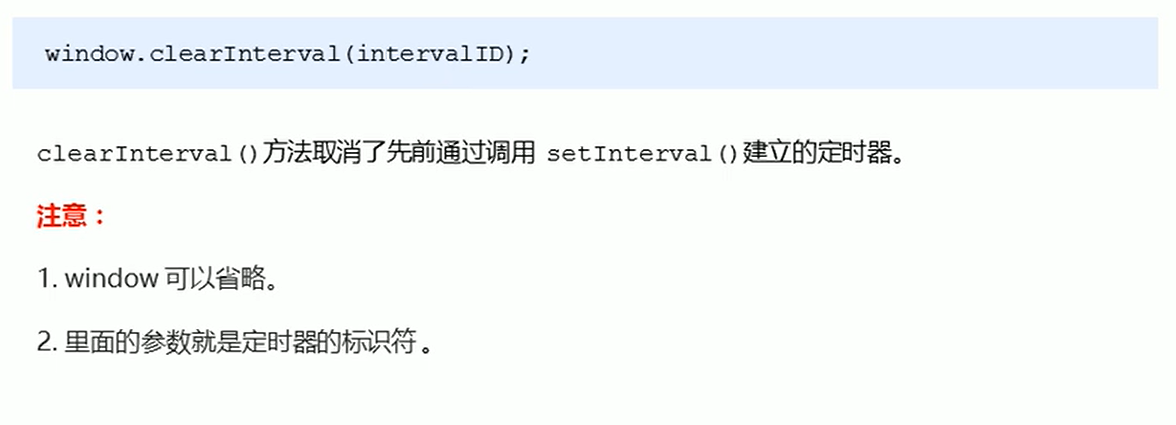
13-清除(停止)setInterval定时器
代码:1
2
3
4
5
6
7
8
9
10
11
12
13
14
15
16
17
18
19
20
21
22
23
24
25
26
27
28
29
30
<html lang="en">
<head>
<meta charset="UTF-8">
<meta name="viewport" content="width=device-width, initial-scale=1.0">
<meta http-equiv="X-UA-Compatible" content="ie=edge">
<title>Document</title>
</head>
<body>
<button class="begin">开启定时器</button>
<button class="stop">停止定时器</button>
<script>
var begin = document.querySelector('.begin');
var stop = document.querySelector('.stop');
var timer = null; // 全局变量 null是一个空对象
begin.addEventListener('click', function() {
timer = setInterval(function() {
console.log('ni hao ma');
}, 1000);
})
stop.addEventListener('click', function() {
clearInterval(timer);
})
</script>
</body>
</html>
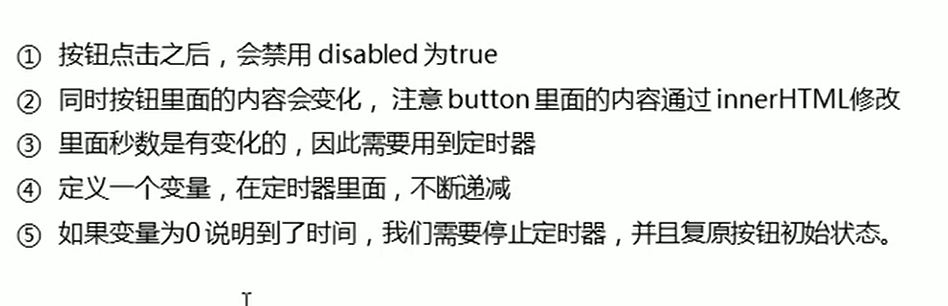
14-发送短信案例
代码:1
2
3
4
5
6
7
8
9
10
11
12
13
14
15
16
17
18
19
20
21
22
23
24
25
26
27
28
29
30
31
32
33
34
35
36
37
38
39
<html lang="en">
<head>
<meta charset="UTF-8">
<meta name="viewport" content="width=device-width, initial-scale=1.0">
<meta http-equiv="X-UA-Compatible" content="ie=edge">
<title>Document</title>
</head>
<body>
手机号码: <input type="number"> <button>发送</button>
<script>
// 按钮点击之后,会禁用 disabled 为true
// 同时按钮里面的内容会变化, 注意 button 里面的内容通过 innerHTML修改
// 里面秒数是有变化的,因此需要用到定时器
// 定义一个变量,在定时器里面,不断递减
// 如果变量为0 说明到了时间,我们需要停止定时器,并且复原按钮初始状态
var btn = document.querySelector('button');
var time = 3; // 定义剩下的秒数
btn.addEventListener('click', function() {
btn.disabled = true;
var timer = setInterval(function() {
if (time == 0) {
// 清除定时器和复原按钮
clearInterval(timer);
btn.disabled = false;
btn.innerHTML = '发送';
} else {
btn.innerHTML = '还剩下' + time + '秒';
time--;
}
}, 1000);
})
</script>
</body>
</html>
15-this指向问题

代码:1
2
3
4
5
6
7
8
9
10
11
12
13
14
15
16
17
18
19
20
21
22
23
24
25
26
27
28
29
30
31
32
33
34
35
36
37
38
39
40
41
42
43
44
45
46
47
48
49
50
51
52
53
54
<html lang="en">
<head>
<meta charset="UTF-8">
<meta name="viewport" content="width=device-width, initial-scale=1.0">
<meta http-equiv="X-UA-Compatible" content="ie=edge">
<title>Document</title>
</head>
<body>
<button>点击</button>
<script>
// this 指向问题 一般情况下this的最终指向的是那个调用它的对象
// 1. 全局作用域或者普通函数中this指向全局对象window( 注意定时器里面的this指向window)
console.log(this);
function fn() {
console.log(this);
}
window.fn();
window.setTimeout(function() {
console.log(this);
}, 1000);
// 2. 方法调用中谁调用this指向谁
var o = {
sayHi: function() {
console.log(this); // this指向的是 o 这个对象
}
}
o.sayHi();
var btn = document.querySelector('button');
// btn.onclick = function() {
// console.log(this); // this指向的是btn这个按钮对象
// }
btn.addEventListener('click', function() {
console.log(this); // this指向的是btn这个按钮对象
})
// 3. 构造函数中this指向构造函数的实例
function Fun() {
console.log(this); // this 指向的是fun 实例对象
}
var fun = new Fun();
</script>
</body>
</html>
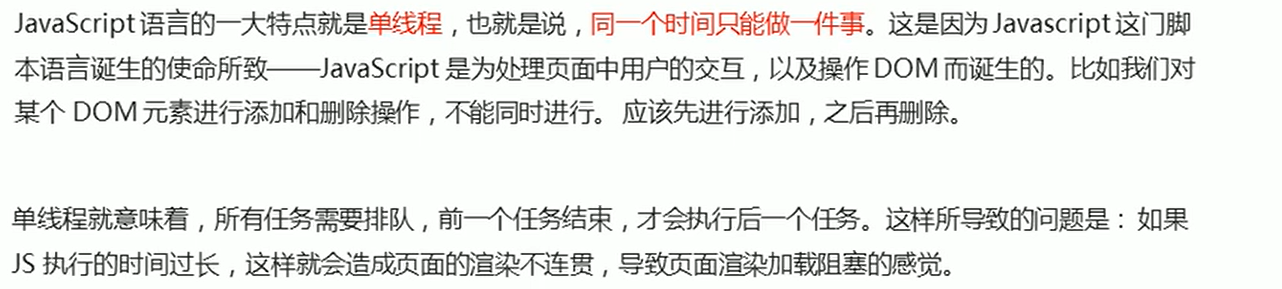
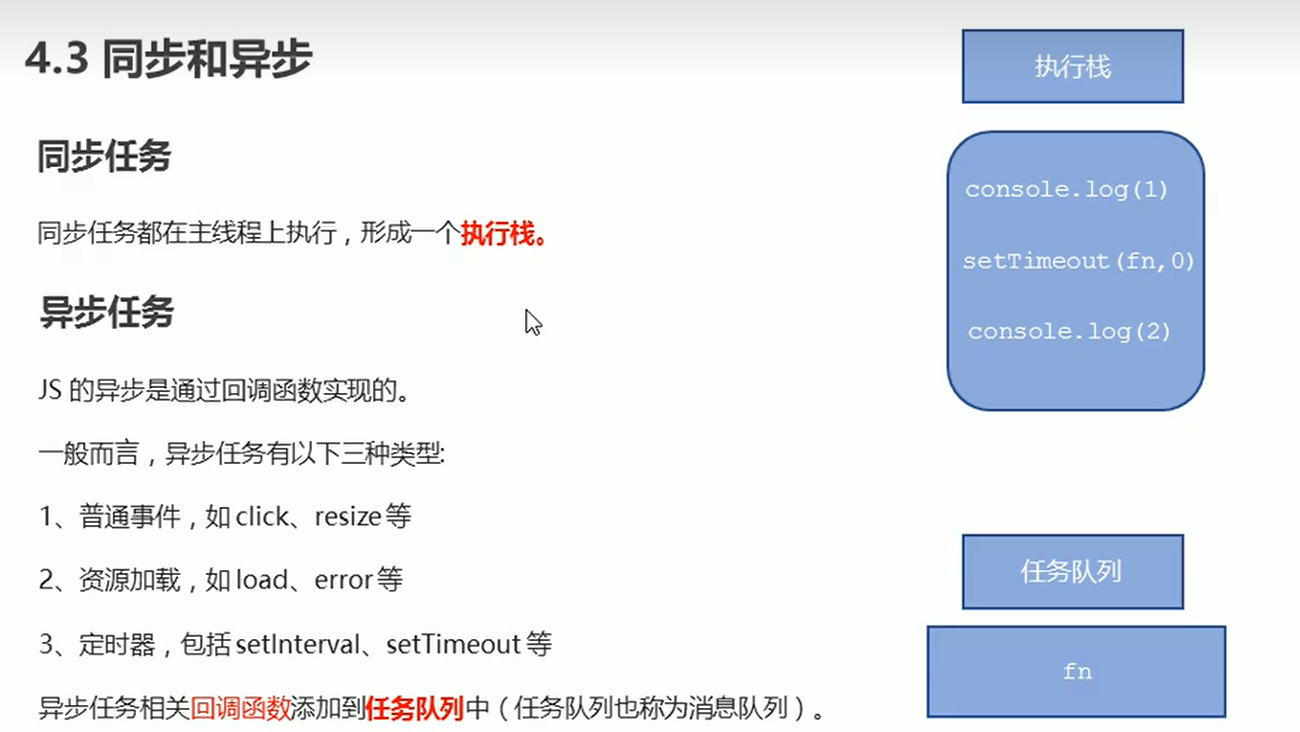
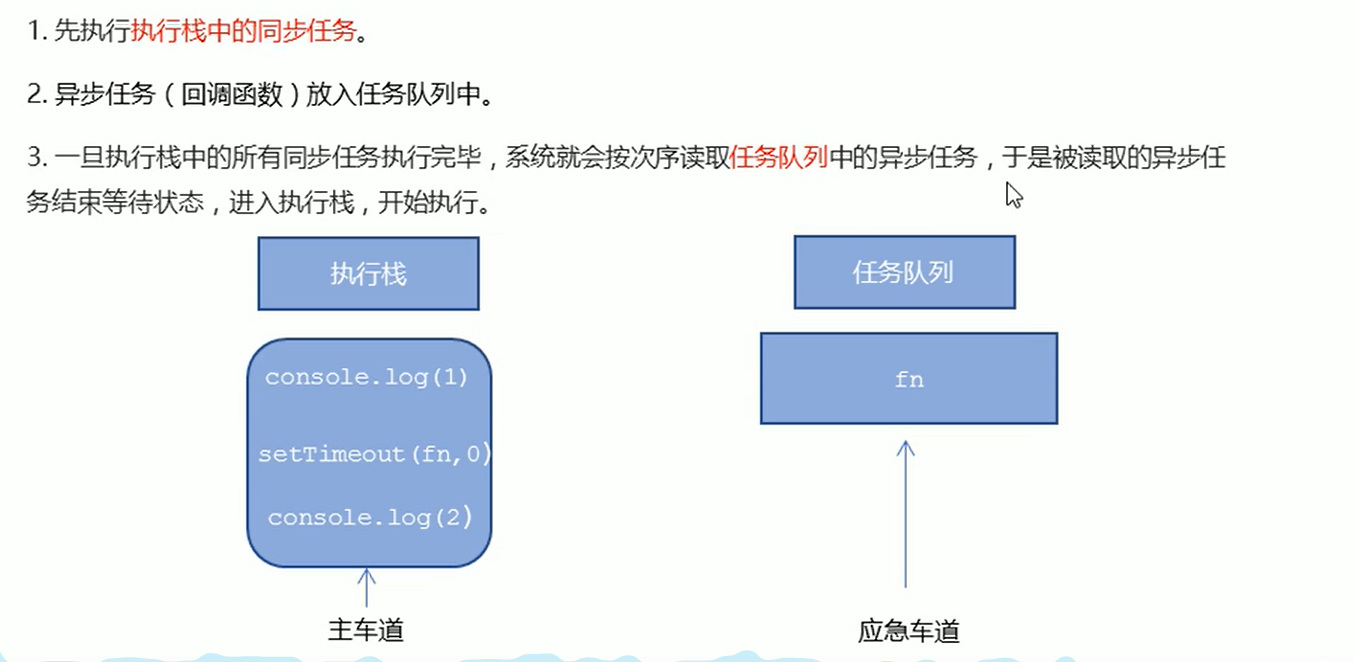
16-JS执行机制
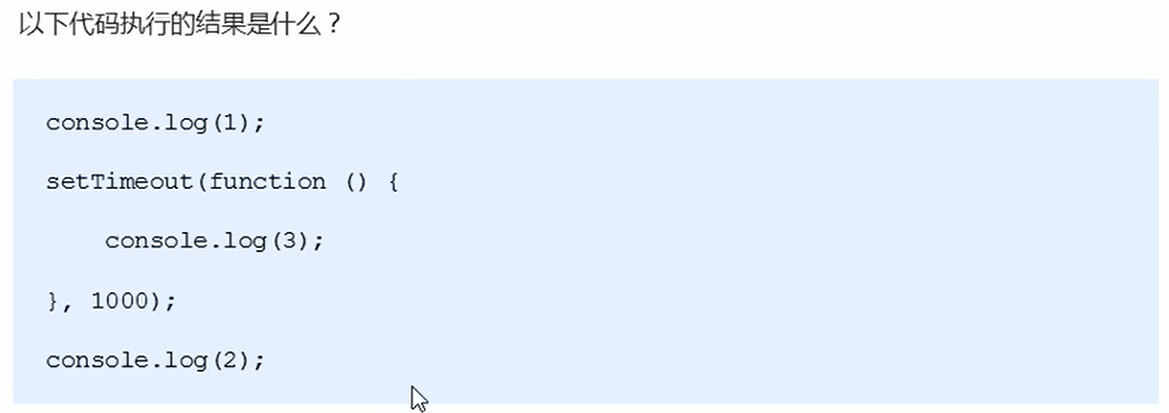
JS是单线程
一个问题本来的执行结果是 1 3 2
而实际结果是 1 2 3
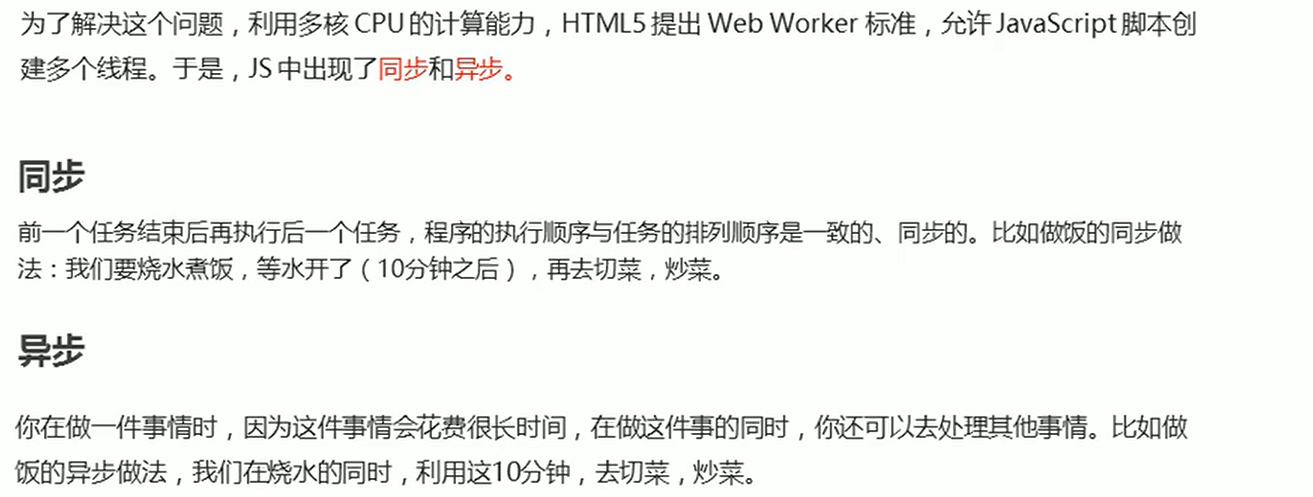
为了解决这个问题,引入同步和异步的概念同步和异步
另一个问题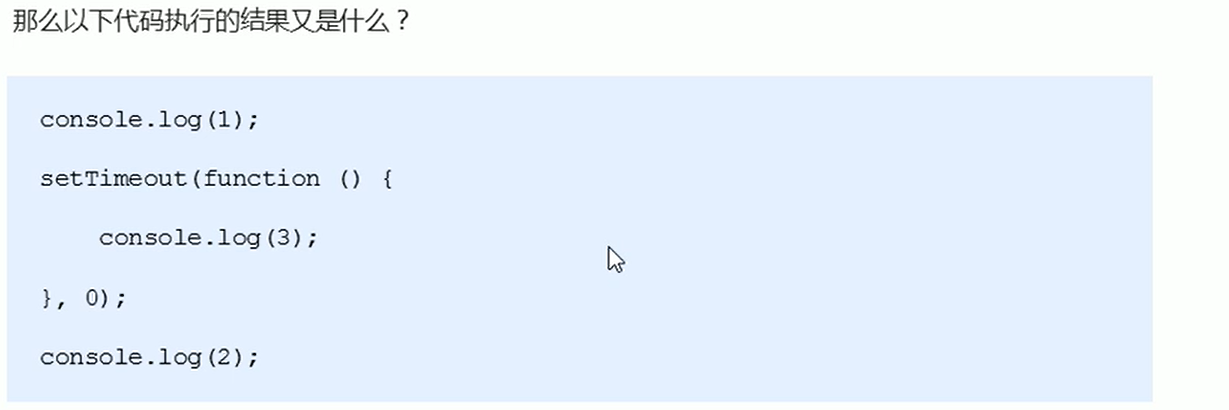
它的执行结果还是 1 2 3
注: 现在JS允许加入多个进程
如果遇到多个多个异步任务时改怎么做如: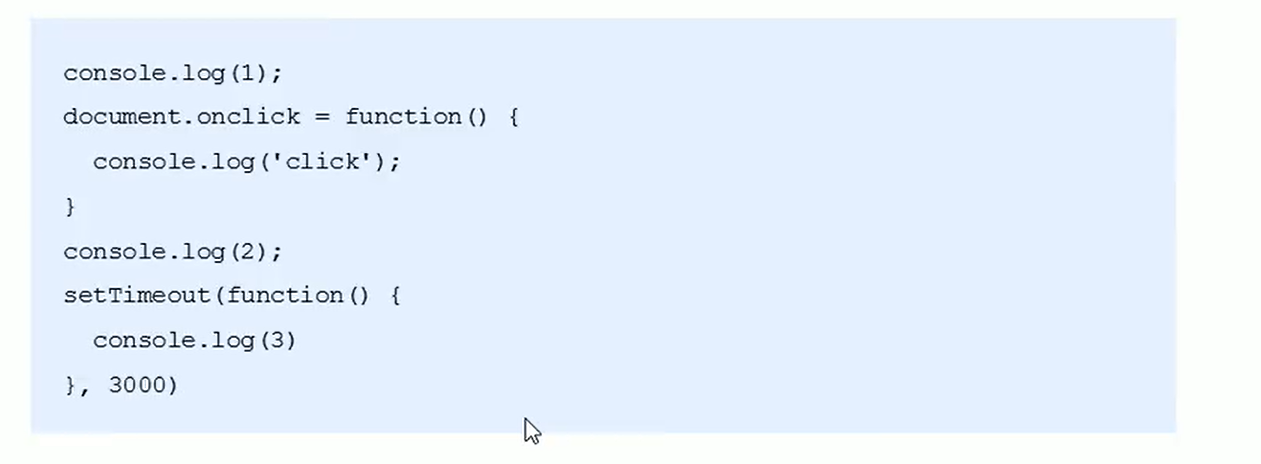
代码执行结果 1 2 3(3秒之后执行) 3(点击之后执行)
循环事件: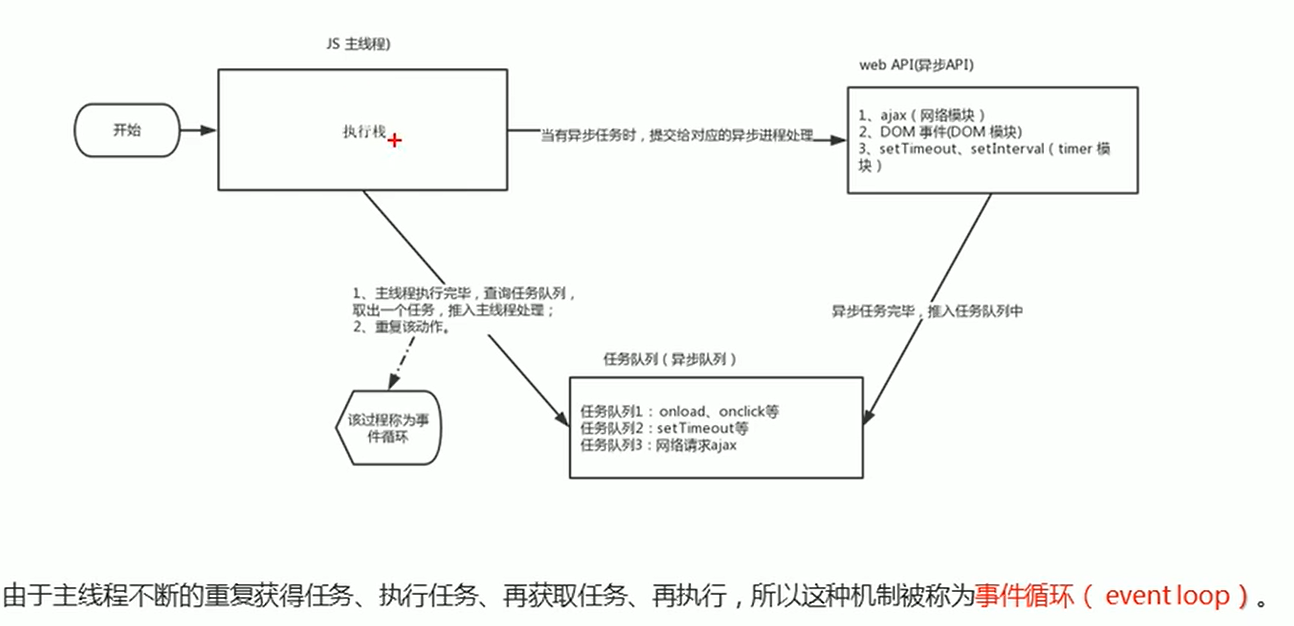
代码:
1 |
|
17-5秒钟之后跳转页面案例
案例分析:
- 利用定时器做倒计时效果
- 时间到了就跳转页面.使用
location.href
代码:1
2
3
4
5
6
7
8
9
10
11
12
13
14
15
16
17
18
19
20
21
22
23
24
25
26
27
28
29
30
31
32
33
34
<html lang="en">
<head>
<meta charset="UTF-8">
<meta name="viewport" content="width=device-width, initial-scale=1.0">
<meta http-equiv="X-UA-Compatible" content="ie=edge">
<title>Document</title>
</head>
<body>
<button>点击</button>
<div></div>
<script>
var btn = document.querySelector('button');
var div = document.querySelector('div');
btn.addEventListener('click', function() {
// console.log(location.href);
location.href = 'http://www.itcast.cn';
})
var timer = 5;
setInterval(function() {
if (timer == 0) {
location.href = 'http://www.itcast.cn';
} else {
div.innerHTML = '您将在' + timer + '秒钟之后跳转到首页';
timer--;
}
}, 1000);
</script>
</body>
</html>
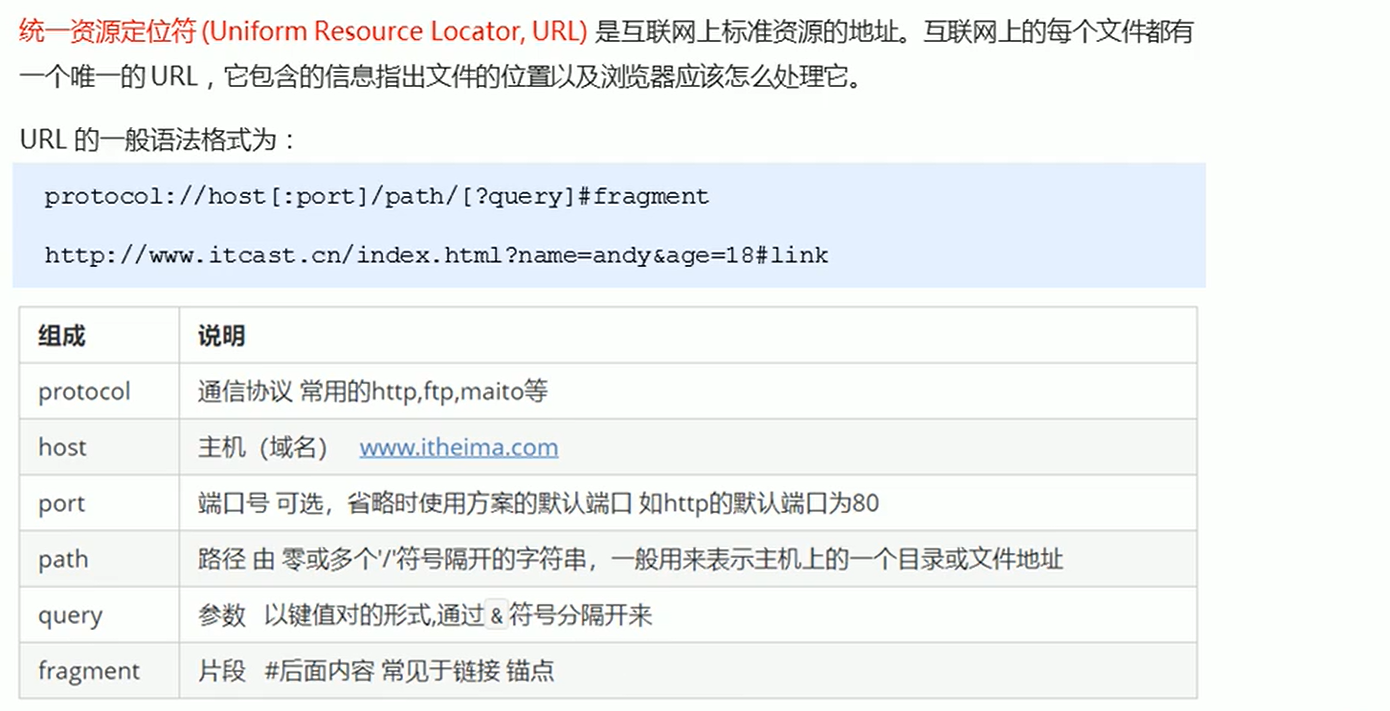
URL(了解)
获取URL
实现不同页面之间的传递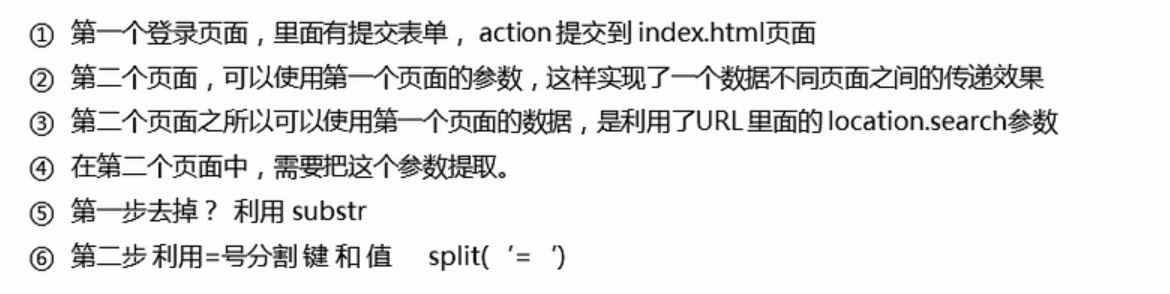
index(1)代码
1 |
|
login代码
1 |
|
18-location常见的属性
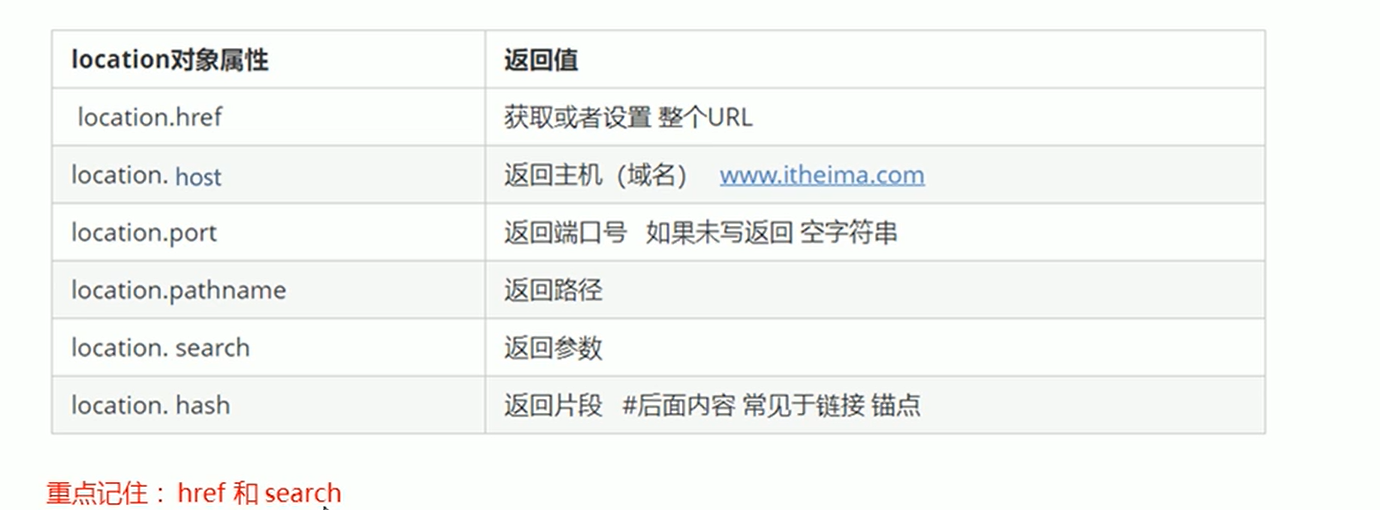
location对象的方法:
代码:1
2
3
4
5
6
7
8
9
10
11
12
13
14
15
16
17
18
19
20
21
22
23
24
25
<html lang="en">
<head>
<meta charset="UTF-8">
<meta name="viewport" content="width=device-width, initial-scale=1.0">
<meta http-equiv="X-UA-Compatible" content="ie=edge">
<title>Document</title>
</head>
<body>
<button>点击</button>
<script>
var btn = document.querySelector('button');
btn.addEventListener('click', function() {
// 记录浏览历史,所以可以实现后退功能
// location.assign('http://www.itcast.cn');
// 不记录浏览历史,所以不可以实现后退功能
// location.replace('http://www.itcast.cn');
location.reload(true);
})
</script>
</body>
</html>
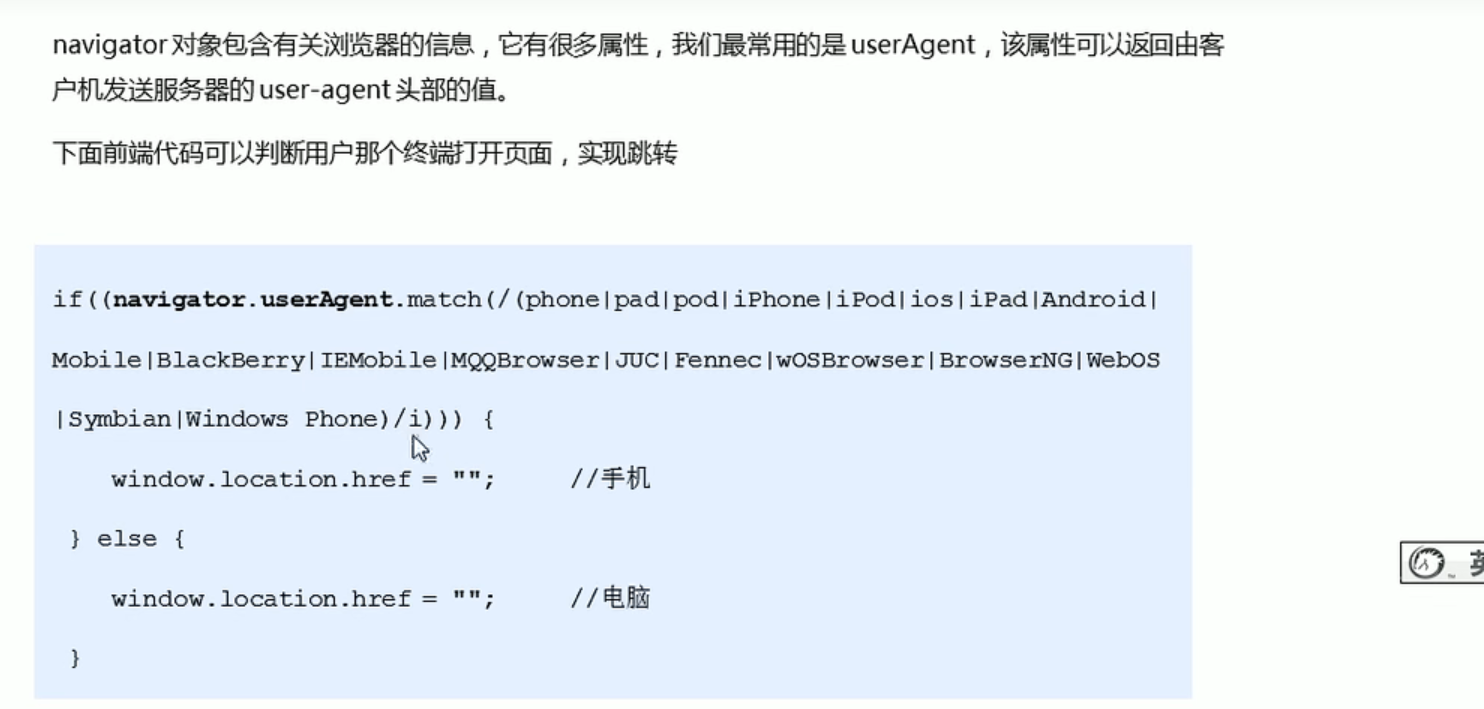
19-navigator对象
20-history对象

history对象一般在实际开发中比较少用,但是会在一些OA办公系统中见到.
例如:
index代码
1 |
|
list代码
1 |
|